Calendar Integration Guide
This tool allows you to centralize your legal agenda, syncing hearings, appointments, and deadlines directly with your external service provider.
1. Account Connection
The first step to centralize your schedule is to establish a secure connection between Prima.Law and your preferred calendar provider (Outlook or Google).
Accessing the module: Go to the administration console and select the Integrations tab.
Selecting the provider: Locate the calendar integration card and select the option corresponding to your provider (for example, Outlook Calendar) and click the connection button.
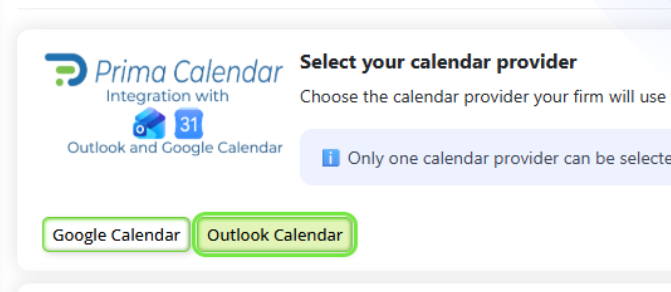
Access Options for Outlook Accounts
When integrating a calendar through the Microsoft Outlook provider, the system will display a menu with two connection alternatives designed to adapt to the structure and needs of your firm:
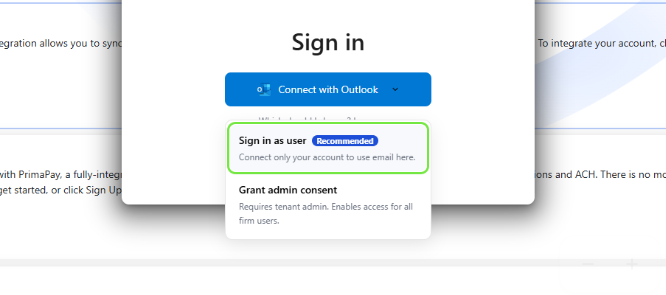
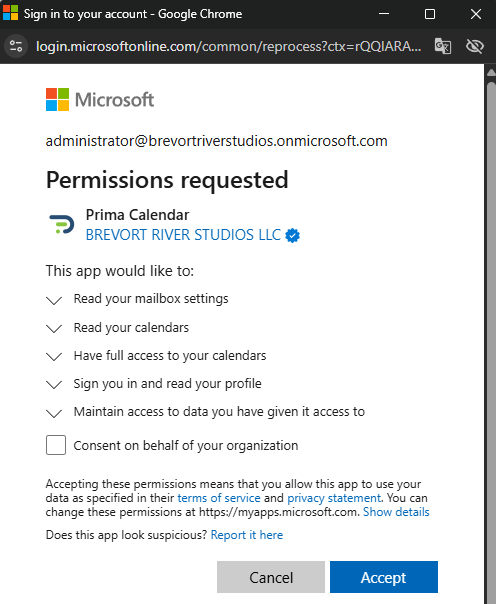
- Sign in as user: This is the recommended option and allows linking both personal and organizational (corporate) accounts. In the case of using an administrative organizational account, the system will prompt you to grant consent for your account and your workspace (tenant) directly. By authorizing this access, you will facilitate the process so that other users in your organization will not require subsequent approvals.
- Grant admin consent: This alternative is designed exclusively for network or workspace administrators. It allows entering administrative credentials to authorize the use of the application globally, without the need to log in or integrate a personal calendar. Upon completing this step, the administrator enables the rest of the firm’s members to begin integrating their own accounts immediately, relying on prior institutional authorization.
Important note: As an administrator, when selecting the provider, the option to integrate their account (Outlook or Google) according to the selection will immediately be enabled for all your users. Users with an admin role will be able to integrate their account from 2 points in the platform: the Admin Panel > Integrations or in the sidebar section Calendars > Calendar Settings (gear icon). Users without the Admin role will only be able to perform the integration through the second option.
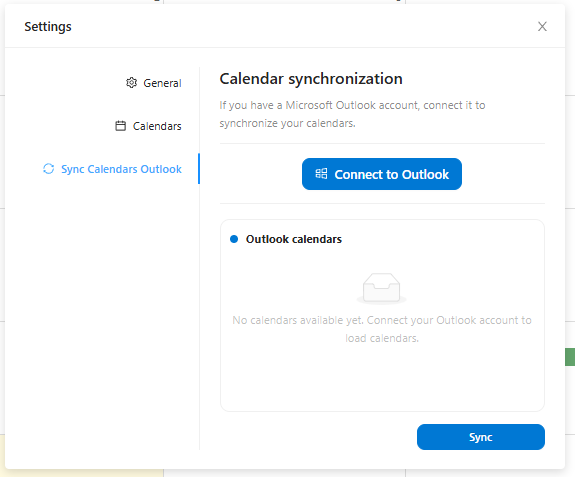
Security Authorization
The system will display a Microsoft or Google login pop-up window. Enter your institutional or personal credentials and authorize the requested permissions. This concession is essential to enable secure data exchange between both platforms.
Once the process is complete, the interface will show a notification confirming the successful integration.
2. Synchronization and Calendar Management
After completing the linkage, the administration panel will be enabled where you can customize the display and behavior of your different schedules.
- Selective Activation: The panel will reflect all calendars associated with your external account. By using the switches in the synchronization column, you can determine which specific calendars will be reflected within Prima.Law.
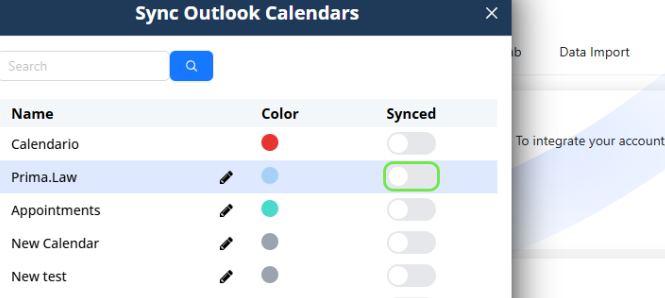
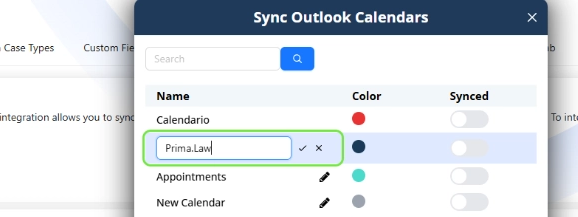
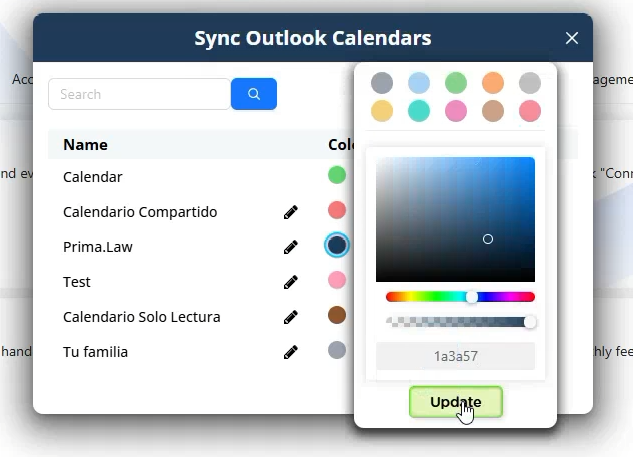
- Visual Customization: To maintain an organized workspace, the platform allows editing the name of each calendar and identifying it using a specific color code. This facilitates the visual distinction of events in the general view.
3. Advanced Configuration and Access Permissions
To optimize the workflow in the firm, the platform includes options to delegate functions and structure schedule visibility levels.
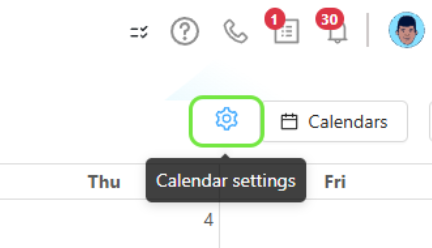
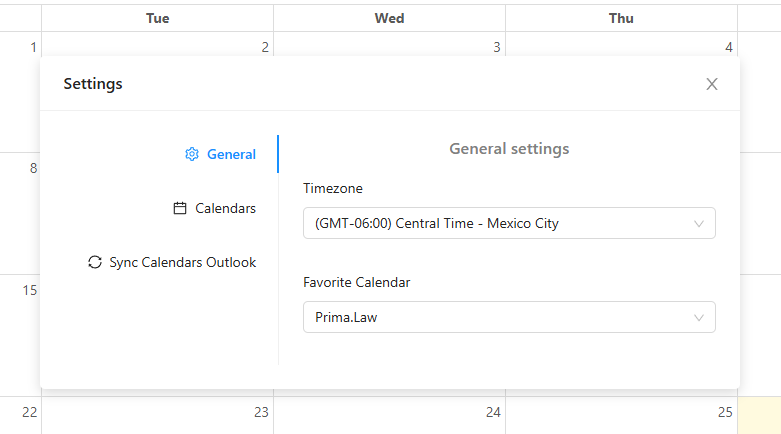
- General Preferences: From the calendar view, access the settings icon (gear wheel). In this section, you can set the time zone corresponding to your professional practice and define a default calendar for quick event creation.
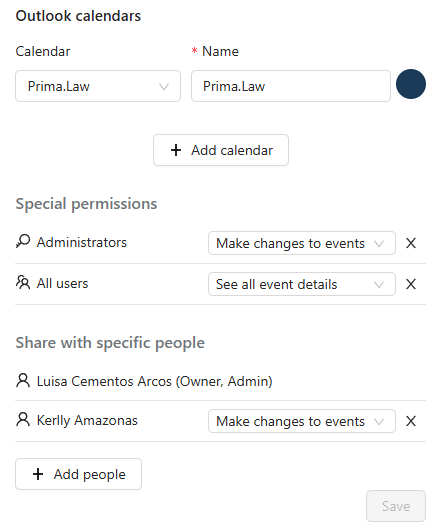
- Delegation structure and permissions: When managing or adding a calendar, it is possible to parameterize visibility restrictions:
- Special Permissions: Allows defining whether full details visibility will be available to all users or restricted solely to administrators.
- Shared Access: Facilitates the assignment of permissions to specific team members, determining the scope of their capabilities (read-only events or ability to make modifications to the schedule).
4. Agenda Visualization
Viewing Modes and Time Navigation
The platform allows you to adapt the schedule grid according to the immediate needs of your workflow, offering different time perspectives:
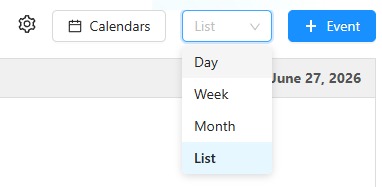
- Viewing Modes: On the top toolbar, you can alternate the presentation of events by selecting the Day, Week, Month, or List tabs. The latter option groups all commitments chronologically in a compact table format, ideal for quick reviews.
- Navigation Filters Behavior: When switching between these views, the options to scroll through time will automatically adapt:
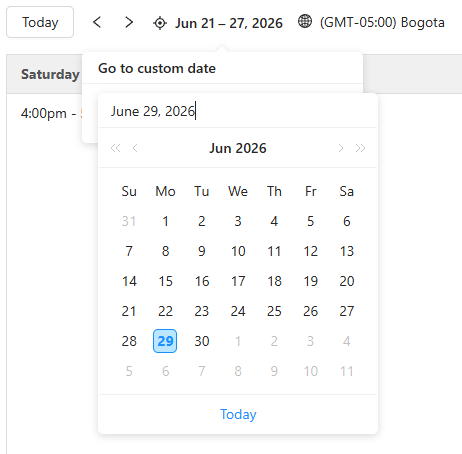
- Day Filter: This selector will only be enabled when any of the viewing modes based on short or sequential ranges (Day, Week, or List) are active, allowing you to precisely jump to a specific calendar date.
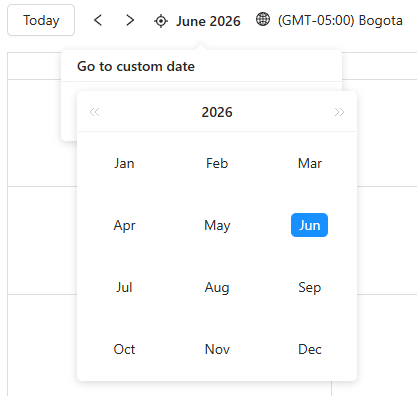
- Month Filter: If the display is set to Month mode, the navigation control will change its behavior to allow you to select a specific month and year directly within the selector, optimizing medium and long-term planning.
Calendar Visibility Control
To facilitate the review of your schedule and maintain an organized workspace, the platform allows you to manage what information is shown on the main screen quickly and easily.
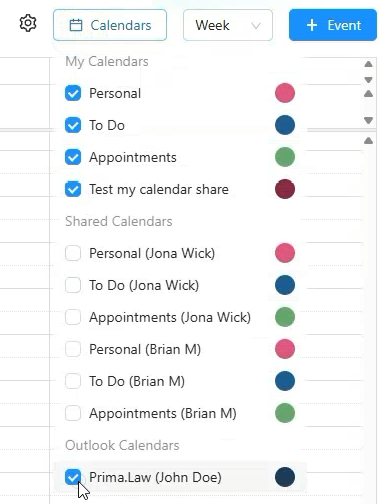
By clicking the Calendars button located on the top bar, an interactive menu will expand. By using checkboxes, you can toggle the visibility of the following categories:
- My Calendars: Your local agendas, created and managed directly within the platform.
- Shared Calendars: Local agendas belonging to other members of the firm who have granted you viewing permissions.
- Provider Calendars (Outlook / Google Calendars): Agendas synchronized from your external platforms. This section groups both your own external calendars and those shared by other users from your same organization (tenant) that have been integrated into the system.
Simply check or uncheck the box located next to the name of each calendar to show or hide their respective events in the general grid. This tool is ideal for filtering information, clearing the screen, and focusing exclusively on the hearings, appointments, or deadlines of a particular agenda.
5. Comprehensive Event Management
Creating events within the platform ensures that all critical information of your processes is simultaneously updated in both Prima.Law and your mobile device or external mail client.
- Event creation: Clicking on any space in the calendar will display the registration form.
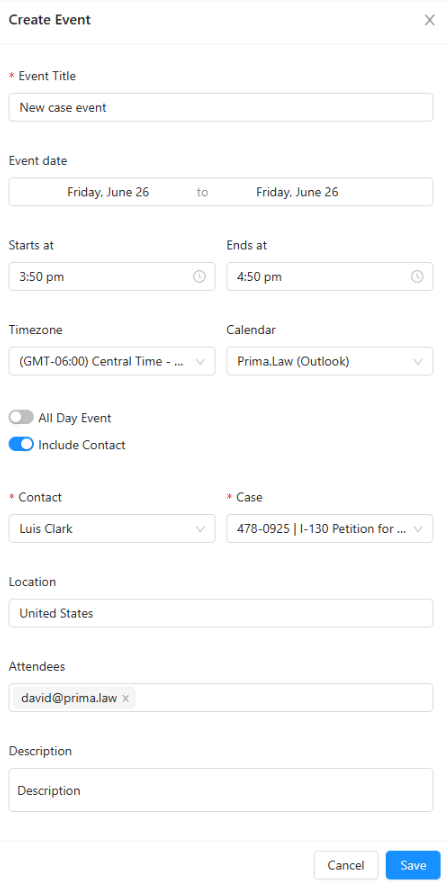
- Linking the file: In addition to the usual data (title, date, time, and location), it is essential to use the association fields to link the event to a specific Contact and Case or file from your database.
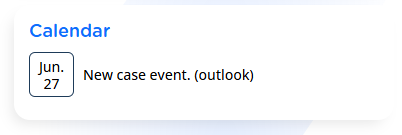
- Real-time update: Upon saving changes, the appointment will be immediately reflected in the general grid. Any subsequent modification or cancellation will be automatically synchronized with your external provider.
6. Centralizing Events within the Case File (Related Events)
One of the main advantages of the platform is the ability to segment calendar information according to the context of each client.
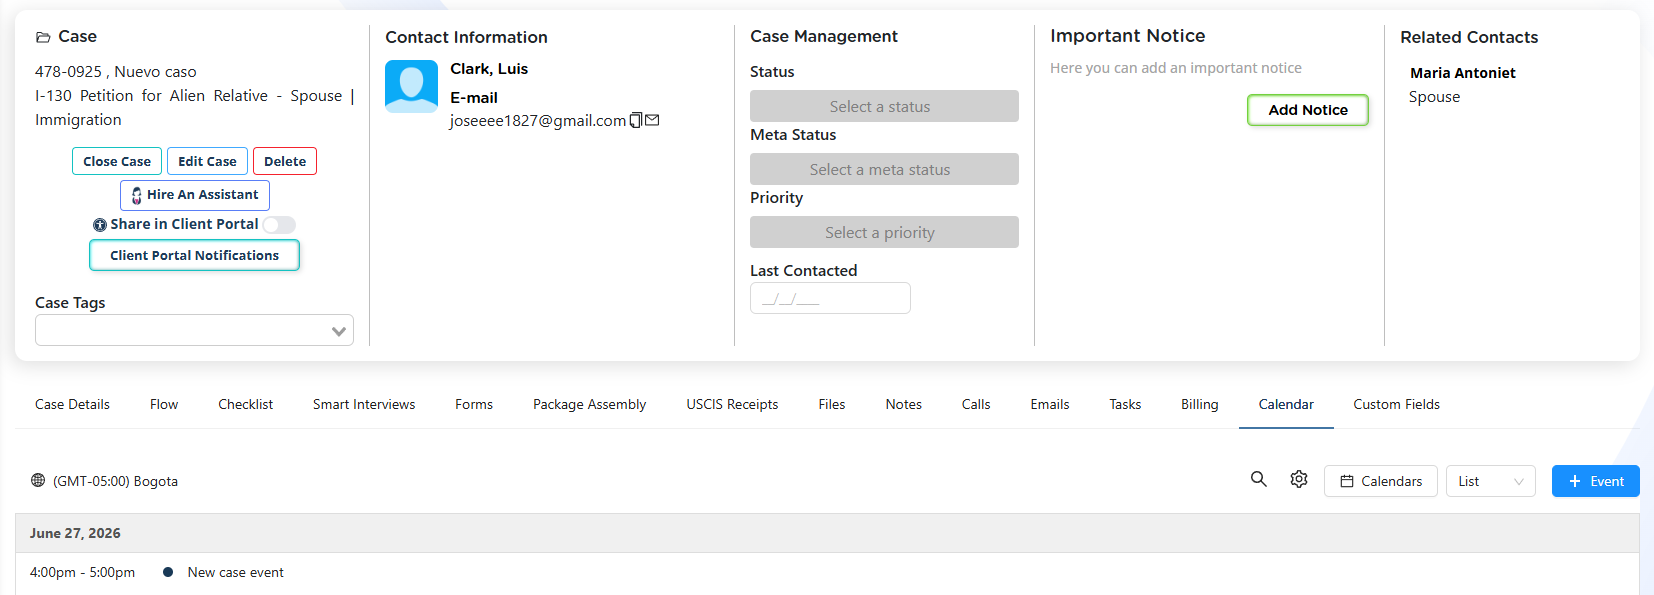
- Consultation by client: By going directly to a contact’s profile or a case file, you will find a tab dedicated exclusively to the Calendar.
- Smart Filtering: This section will omit the rest of the firm’s global commitments and will only show the hearings, meetings, and deadlines strictly related to that file, optimizing review time prior to a proceeding.
7. Disconnecting the Integration
If an account change or access revocation is required, the system allows performing a clean disconnection without compromising the integrity of the main database.
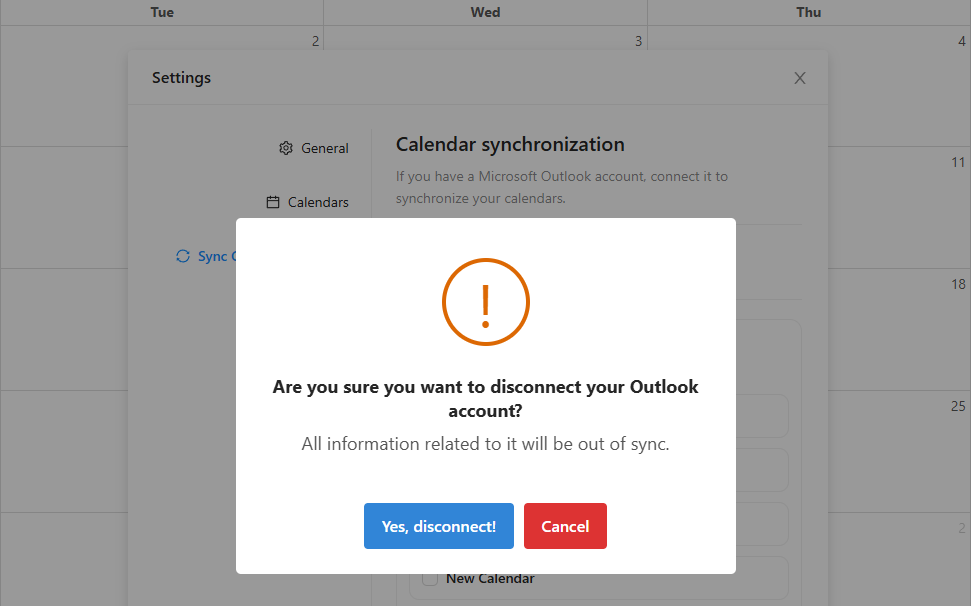
- Disconnection Procedure: Go to the calendar settings and locate the disconnect button corresponding to the active provider.
- Security Confirmation: Upon requesting removal, the system will require an explicit confirmation via a pop-up window. By accepting, bidirectional data communication will stop immediately, and the active synchronization history will be securely cleared.