
Using the Case Management Board
Accessing the Case Management Board
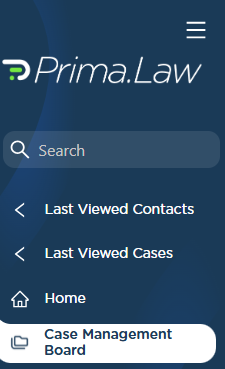
You can access the Case Management Board from the left-hand sidebar. It appears directly below the Home button.
When you open the Case Management Board for the first time, you will see a single default view called Overview.
Who Can Manage Statuses and Meta Statuses
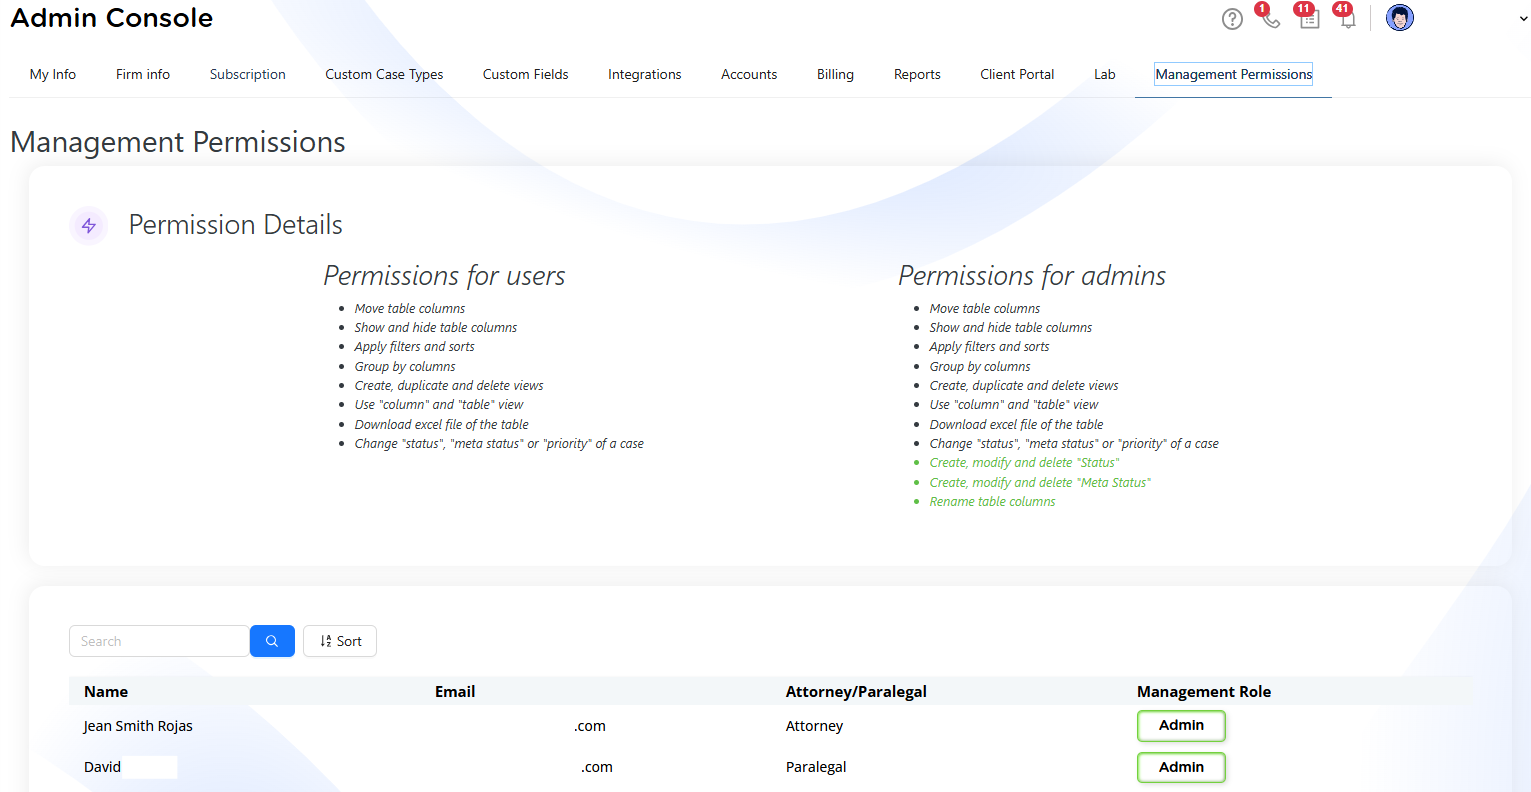
Statuses and Meta Statuses are a core part of the Case Management Board, but not every user can create or manage them.
By default:
- Only administrators can create, edit, delete, or reorder statuses and meta statuses
- Administrators control this access level
Administrators can grant additional permissions by navigating to:
- Administrator Panel
- User Permissions
From there, they can allow selected users to:
- Create, update, or delete statuses
- Create, update, or delete meta statuses
- Manage related table configuration
This permission structure ensures consistency while still allowing flexibility when needed.
Understanding the Default Overview
The Overview view displays a broad snapshot of your cases. By default, it includes common columns such as:
- Contact Name (links to the contact)
- Case Name (links to the case)
- Case Type
- Assigned Attorney or Paralegal
- Status
- Meta Status
- Open or Closed indicator
This view is intentionally broad so new users can immediately see activity across the system. However, it is only a starting point.
Views and Customization
Views are saved configurations of columns, filters, grouping, and sorting. Each view represents a different way of looking at your cases.
At the top of the Case Management Board, you will see a plus (+) button. This allows you to create additional views without affecting existing ones.
Each view can be customized independently.
Customizing Columns
Not all available columns are shown by default. This avoids overwhelming the board with information.
To customize visible columns:
- Click Customize below the view tabs
- Enable or disable columns you want to see
Examples of additional columns you may choose to display include:
- Priority
- Completion goal date
- Case tags
- Client Portal status
- Last call date
Enabled columns also become available as parameters for filtering, grouping, and sorting.

Managing Statuses and Meta Statuses from the Board
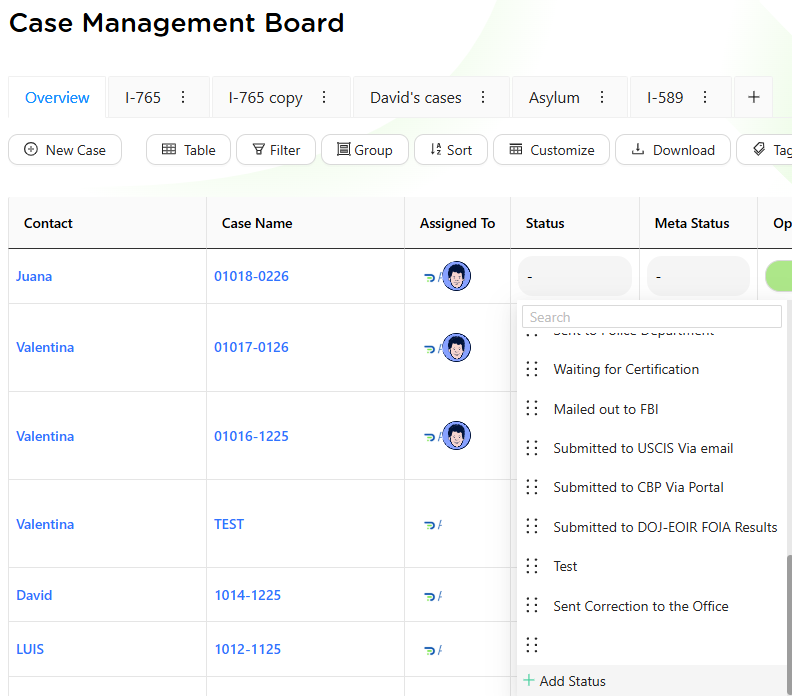
Statuses and Meta Statuses are managed directly from the Case Management Board.
In the Status or Meta Status columns, each cell includes a dropdown menu. From this dropdown, you can:
- Search existing statuses or meta statuses
- Assign a value to a case
- Remove a value by selecting None
Scrolling to the bottom of the dropdown reveals the Add Status or Add Meta Status option (administrator permission required).
Creating a New Status or Meta Status
When adding a new status or meta status, you can configure:
- Name and label
- Background color (from preset options or a custom color picker)
- Text color (black or white for readability)
Custom colors can be selected directly from the pop-up interface.
Once saved, the new status or meta status becomes immediately available throughout the system and can be applied to open or closed cases.
Statuses and meta statuses can also be reordered from the Case Management Board so they appear in a logical order in dropdown menus.
Filtering: Building Work Queues
Filters allow you to narrow the board to only the cases you need to focus on.
When adding a filter, you choose:
- The column (parameter)
- The operator (equals, not equals, contains, is empty, is not empty)
- The value
For example, to see only cases under attorney review:
- Column: Status
- Operator: Equals
- Value: Attorney Review
You can apply multiple filters at once, such as filtering by case type, open/closed status, or assigned staff.

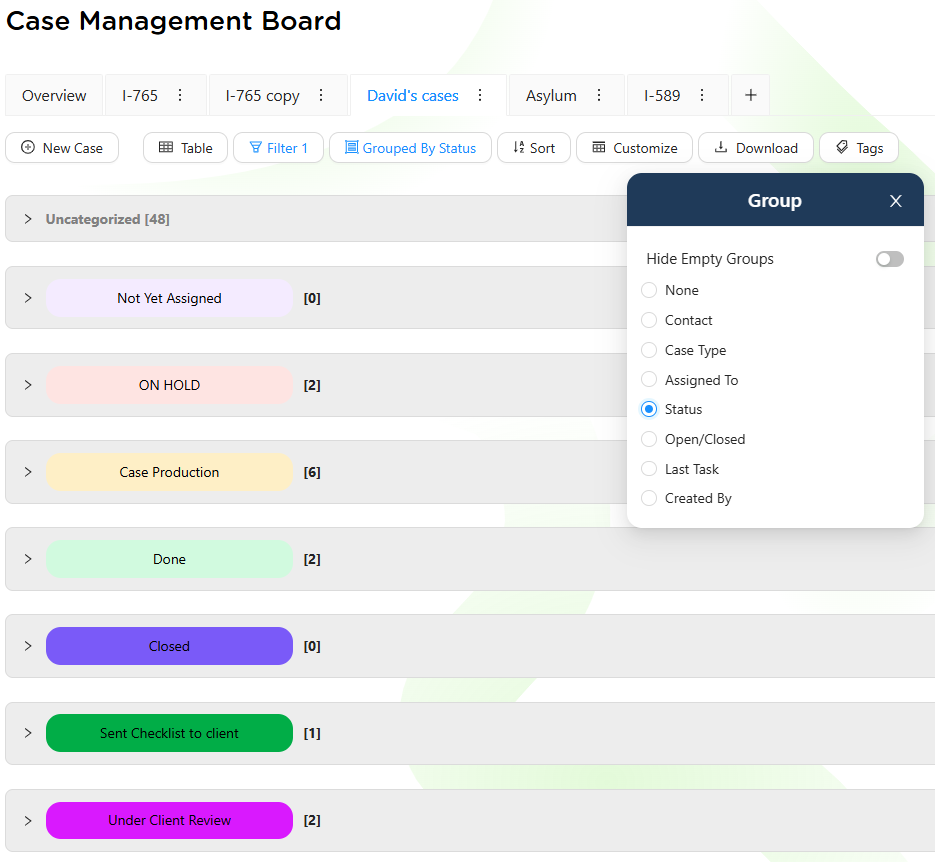
Grouping: Seeing Patterns and Bottlenecks
Grouping organizes cases into visual sections based on a selected column.
For example, you may:
- Group by Meta Status to see who cases are waiting on
- Group by Assigned To to distribute workload
- Group by Case Type to focus on a specific practice area
Grouping works especially well when combined with filters.
Example workflow:
- Filter cases where Status equals Attorney Review
- Group by Assigned To
This immediately shows which staff members have cases pending review.
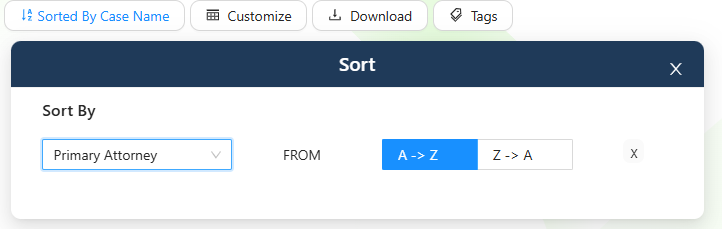
Sorting: Ordering Your Results
Sorting controls the order in which cases appear within a view.
You can sort by:
- Contact Name
- Case Name
- Due Date
- Priority
Sorting can be applied alphabetically or chronologically and works alongside filters and grouping.
Saving Custom Views
Once you have configured columns, filters, grouping, and sorting, you can save the setup as a view.
Saved views allow you to return to the same configuration without rebuilding it each day.
Examples of useful views include:
- Open cases assigned to a specific paralegal
- Cases waiting on the client
- Open I-130 cases
- EAD renewals in progress
Views can be created, renamed, or deleted as your workflow evolves.

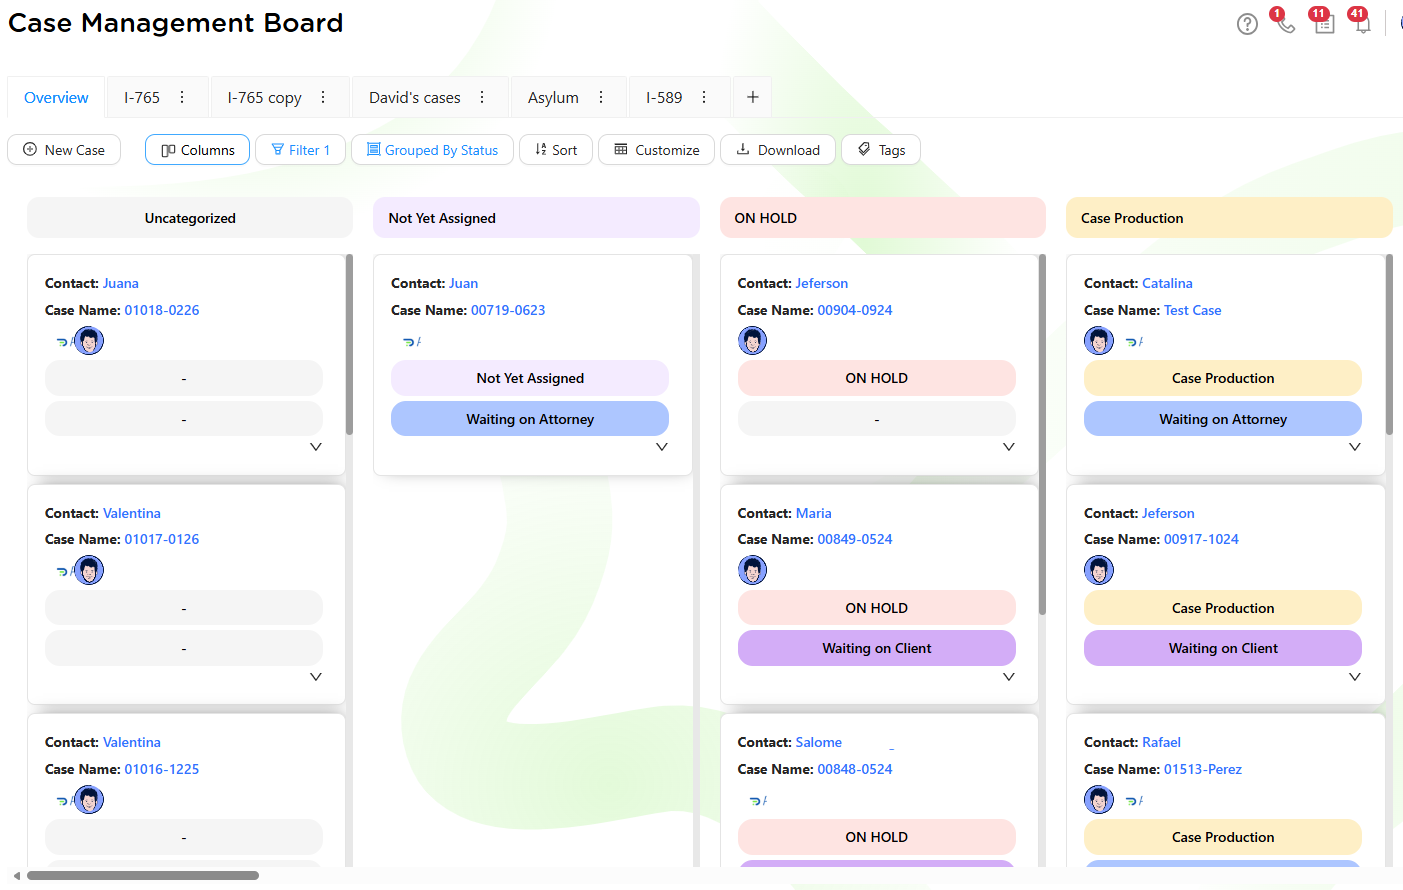
Table View and Column View
By default, the Case Management Board opens in a table layout. If you prefer a visual workflow, you can switch to the column-based view.
The toggle for switching views is located next to the filtering controls.
Column view is useful for users who prefer to track progress by status stages rather than rows.
Tags and Exporting Data
From the Case Management Board, you can:
- Assign, manage, or delete case tags
- Filter or group cases by tags
- Export the current view as an Excel (XLSX) file
Exporting is useful for reporting, analysis, or sharing data outside the system.

Why the Case Management Board Matters
The Case Management Board pulls together everything you do on the Case Page:
- Statuses and meta statuses
- Assigned staff
- Tags
- Dates and priorities
Because it reflects real-time case data, the board becomes a live operational tool rather than a static report.
Managers can use it to identify bottlenecks, rebalance workloads, and monitor progress. Individual users can use it to organize daily tasks and focus on the right cases at the right time.
Best Practices
- Use statuses and meta statuses consistently
- Create views that reflect real work queues
- Save views instead of rebuilding filters daily
- Customize columns to reduce visual noise
- Revisit views as workflows change
When used correctly, the Case Management Board replaces spreadsheets and manual tracking, giving you a clear, flexible, and reliable way to manage casework in Prima.Law.