
Creating a Custom Case Types
Custom case types allow your firm to standardize workflows, forms, and document checklists for specific case types. This feature is available only to administrators.
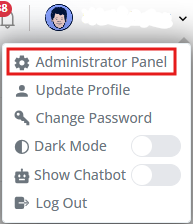
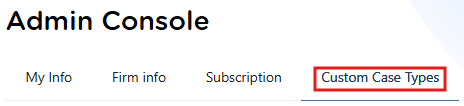
Step 1: Access Custom Case Types
- Click your username (top-right corner).
- Select Administrator Panel.
- Open the Custom Case Types tab.
- Click New.
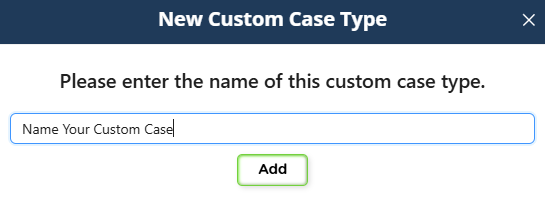
Step 2: Name the Template
- Enter a clear and descriptive name for your custom case type.
- Click OK.
Tip: Use naming conventions that make it easy for your team to identify the purpose of the template (for example, “Family-Based Adjustment – Internal Workflow”).
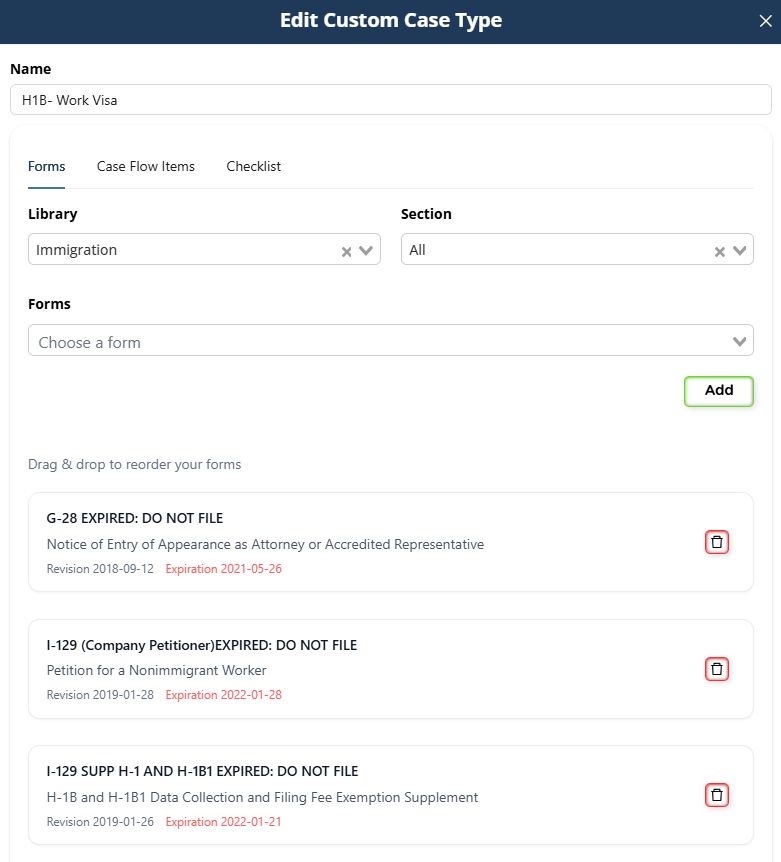
Step 3: Add Forms
- Go to the Forms section within the template editor.
- Search for and select the forms you want included.
- Click Add for each form.
These forms will automatically appear whenever this case type is selected for a new case.
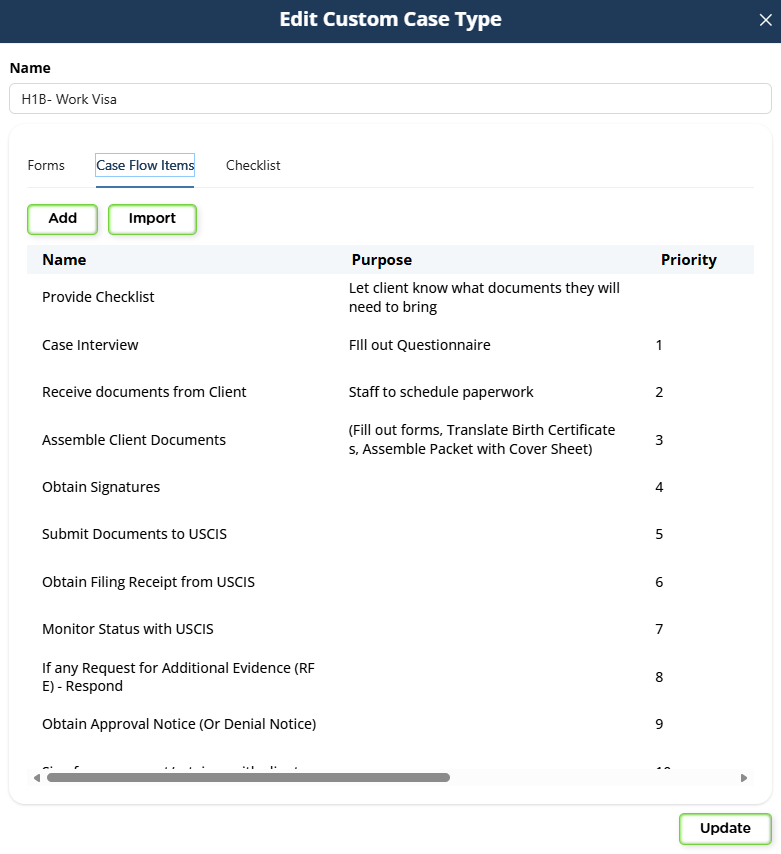
Step 4: Configure Case Flow Items (Workflow Steps)
Next, move to the Case Flow Items tab.
Case Flow Items represent the internal workflow steps your firm follows to complete the case (for example: Intake Review, Document Collection, Draft Forms, Attorney Review, Filing).
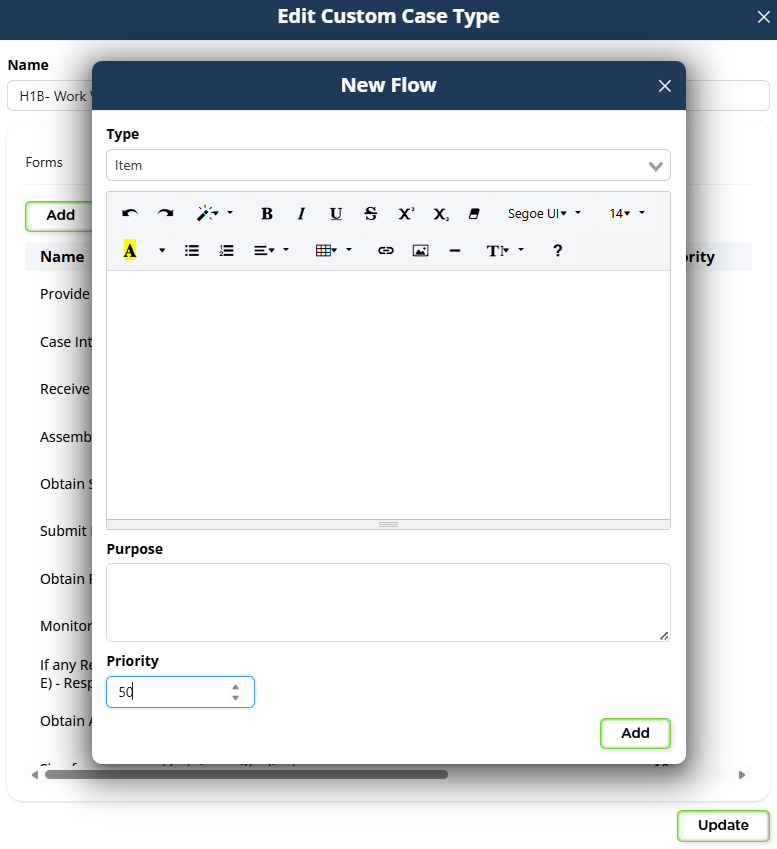
- Click to add a new flow item.
- Enter the step name.
- Assign a priority value.
Recommended best practice:
- Use increments of 10 (10, 20, 30, etc.).
- This makes it easier to insert additional steps later without reorganizing everything.
You can also import flow items from an existing template if you want to reuse a similar structure.
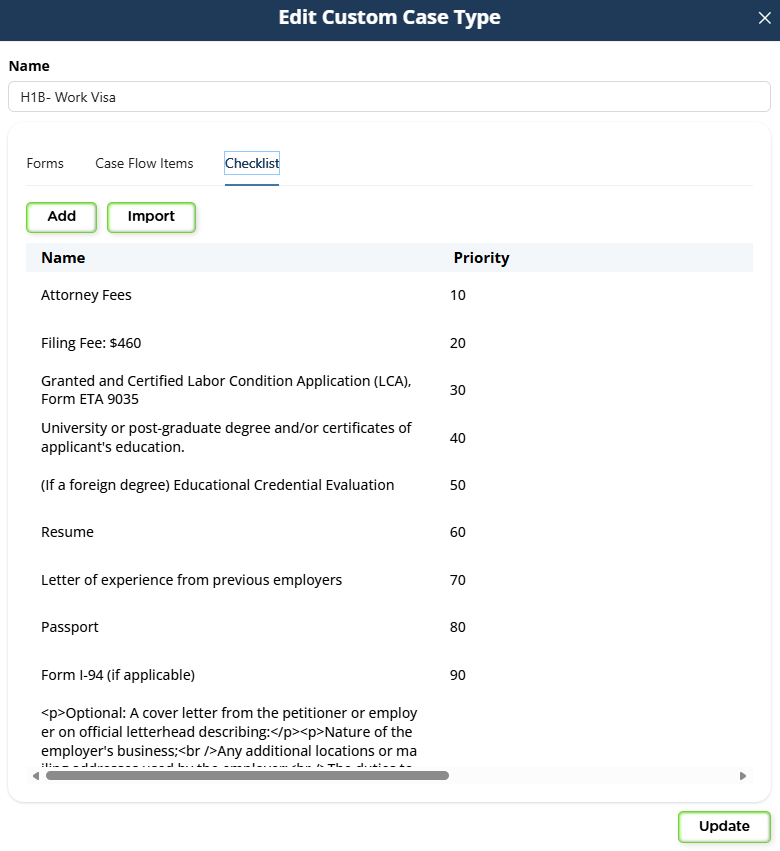
Step 5: Build the Checklist
Go to the Checklist tab.
Checklist items represent the documents or information required from:
- The client (passport, birth certificate, tax returns, etc.), or
- The attorney/staff (draft forms, exhibits, filing fees, etc.).
- Click to add a new checklist item.
- Enter the item description.
- Assign a priority value (again, increments of 10 are recommended).
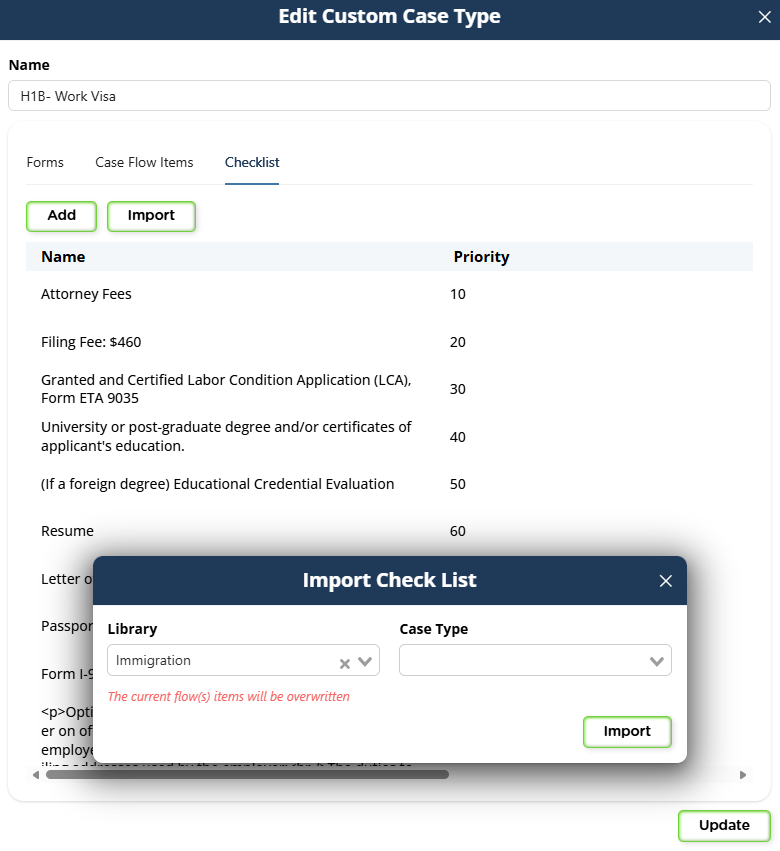
You may also import checklist items from previously created templates to save time.
Step 6: Save the Template
Once you’ve added:
- Forms
- Case Flow Items
- Checklist items
Click Update (or Save) to finalize the custom case template.

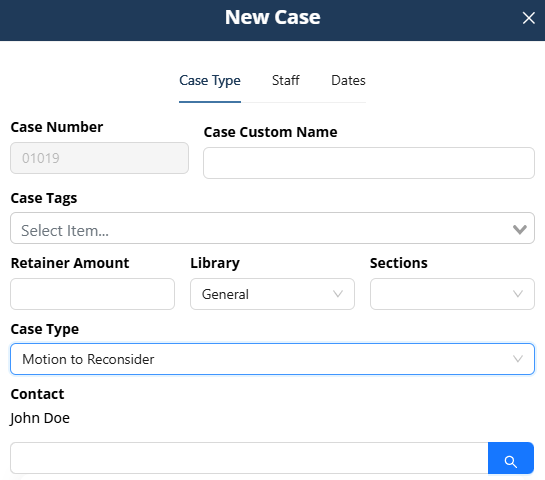
Using Your Custom Template
When creating a new case:
- Open the client’s Contact.
- Click New Case.
- Select your newly created custom case type from the list.
The case will automatically include:
- All selected forms
- The defined workflow steps
- The checklist items
Best Practices
- Keep naming consistent across templates.
- Use flow items to reflect your real internal process.
- Use checklist items to standardize document collection.
- Use priority increments (10, 20, 30…) to allow flexibility later.
- Review templates periodically and update them as your workflow evolves.
Custom case templates help your firm stay organized, consistent, and efficient across all casework.