
Creating Your First Case
What a Case Represents in Prima.Law
A case is not just a container for forms. It is a structured workflow tied to a specific legal matter. Each case:
- Pulls data from the contact it is created under
- Uses predefined or custom case types to guide work
- Tracks deadlines, progress, and responsibilities
- Centralizes all documents, communications, and billing
Once a case is created, it becomes the primary place where casework is performed.
Creating a New Case
You can create a case from multiple locations in Prima.Law, and the setup flow is the same regardless of where you start.
Creating a Case from the Home Page
From the Home page, click the plus (+) button in the top menu and select New Case under the Cases section. The Home page also shows overdue cases and recently viewed cases, but creation always begins from the same New Case interface.
Creating a Case from a Contact Page
You can also create a case directly from a contact:
- Open the contact
- Go to the Cases section on the Contact Page
- Click New Case
When creating a case from a contact, the contact is already selected, so you do not need to choose it again.
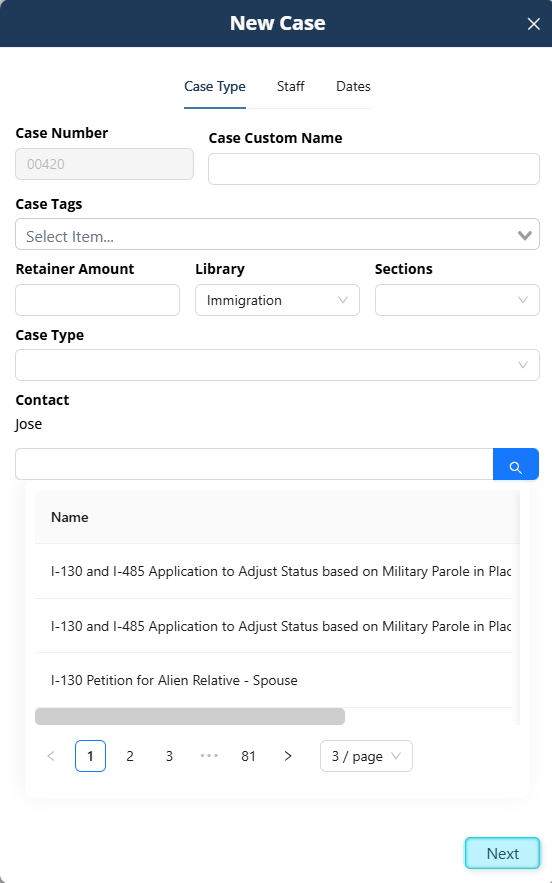
Step 1: Case Basics
The first screen of the New Case interface collects core identifying information.
Case Number
Case numbers are generated automatically by Prima.Law. They are system identifiers based on creation order and cannot be edited.
Case Custom Name
The custom name is optional and used for internal clarity. Many firms use naming conventions or internal codes to make cases easier to identify in lists and reports.
Case Tags
Tags are optional and work similarly to contact tags. They allow you to filter, group, and organize cases later, especially when using the Case Management Board.
Retainer Amount
You may enter a retainer amount if you want to track it for reference or billing purposes. This field is optional.
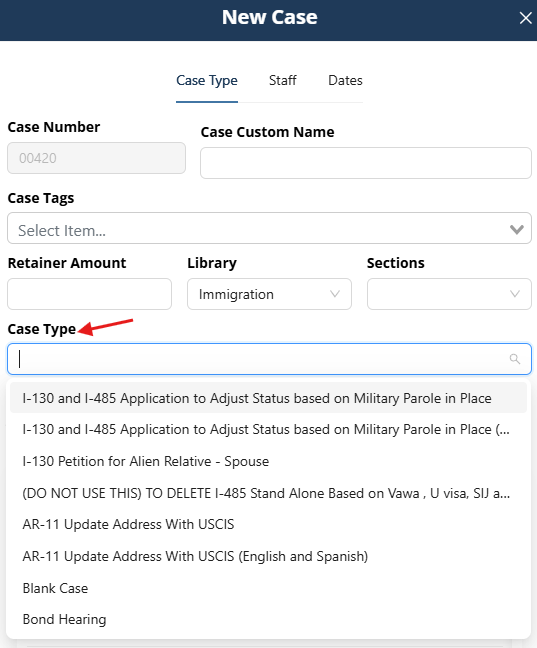
Step 2: Choosing a Library and Case Type
Library Selection
The library determines which case types are available. Common libraries include:
- General
- Immigration
- Federal Court
- Social Security Administration
- State-specific libraries (such as California or Michigan)
If you only have access to the Core (General) library, you will see a limited set of case types. Administrators can create custom case types within the General library if needed.
Selecting a Case Type
Case types define the workflow, forms, checklists, and flows associated with the case. Because the list of case types is extensive, searching is recommended:
- Search by form number (for example, I-130, I-485, I-765)
- Search by keyword (such as VAWA, adjustment, visa)
This flexibility allows you to quickly locate the correct case type even in large libraries.
Step 3: Assigning the Contact
If the case is created from the Home page or Case Management Board, you must select the contact the case belongs to. If it is created from the Contact Page, this step is skipped automatically.
Cases should always be created under the primary individual or entity associated with the matter.
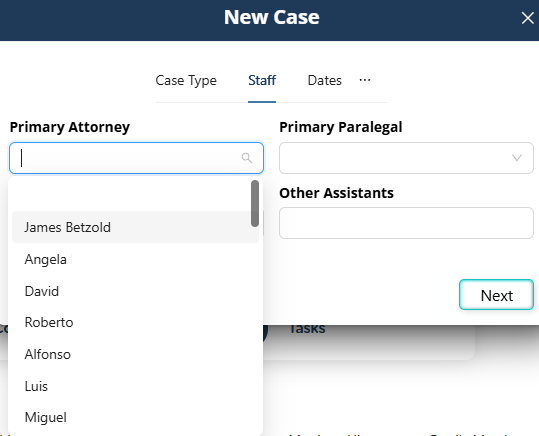
Step 4: Assigning Staff
You must assign at least one staff member to the case. Options include:
- Primary attorney
- Primary paralegal
- Additional attorneys
- Additional assistants
At minimum, one attorney or one paralegal must be assigned.
Step 5: Dates and Deadlines
You can set:
- Expiration date
- Completion goal date
These dates power overdue case tracking and deadline visibility throughout the system.
After completing this step, click Save to create the case.
The Case Page Overview
After saving, you are taken directly to the Case Page. This is where most casework happens.
Top Section: Case Header
The header includes:
- Case name
- Options to edit, close, or delete the case
- Client Portal sharing options
- Case tags
Contact Information
This section mirrors key contact data:
- Name
- Mailing address
- Phone numbers
Case Management Fields
You can assign:
- Status
- Meta status
- Priority
Statuses and meta statuses are managed from the Case Management Board and used for filtering, sorting, and reporting.
The Last Contacted field allows you to track recent client communication.
Important Notice and Related Contacts
Important Notices are shared between the contact and the case. Related contacts are displayed here and are critical for form role assignment and autofill.
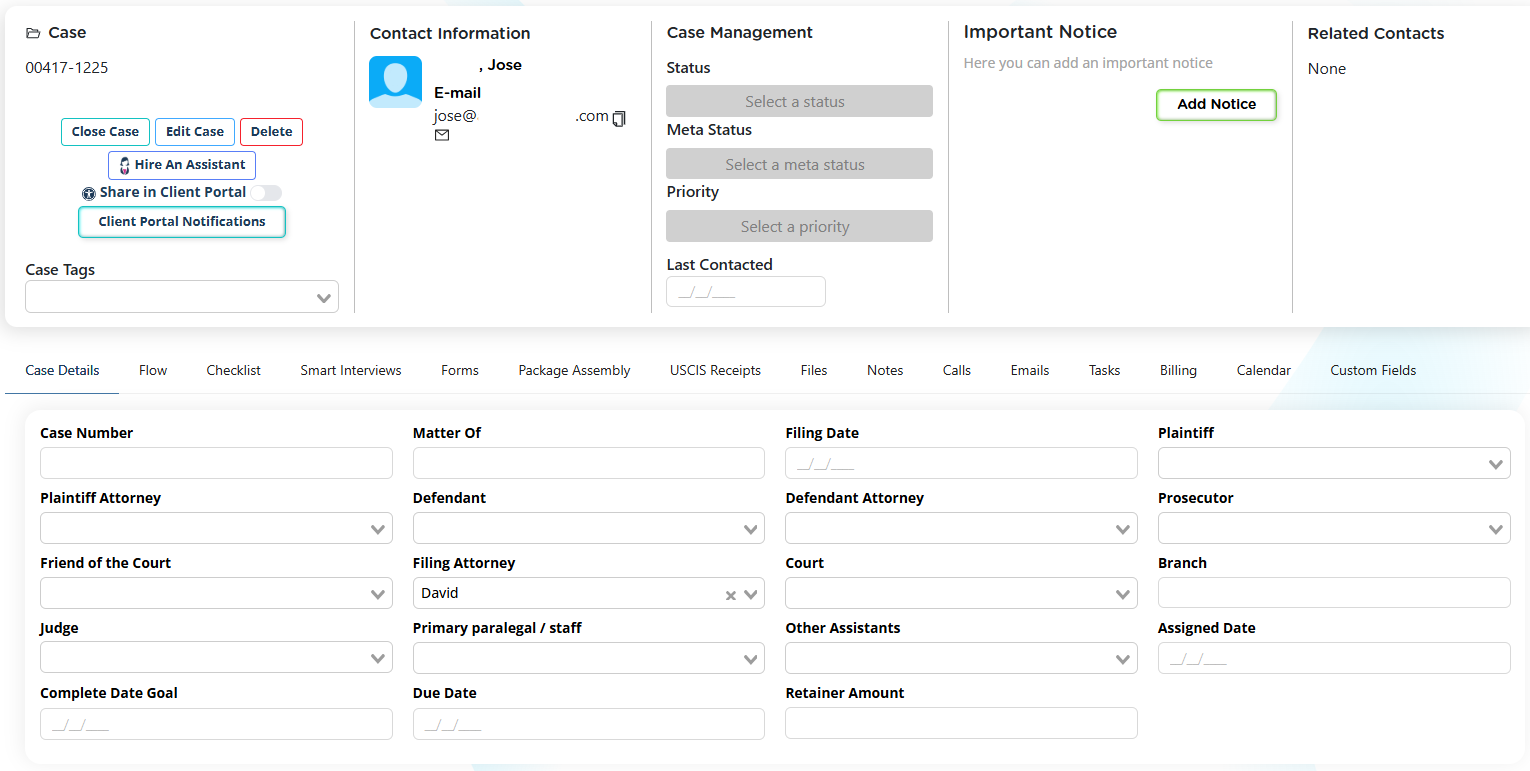
Case Page Tabs
Case Details
This tab displays informational data, including:
- Assigned staff
- Filing attorney
- Sign date
- Completion goal date
- Retainer amount

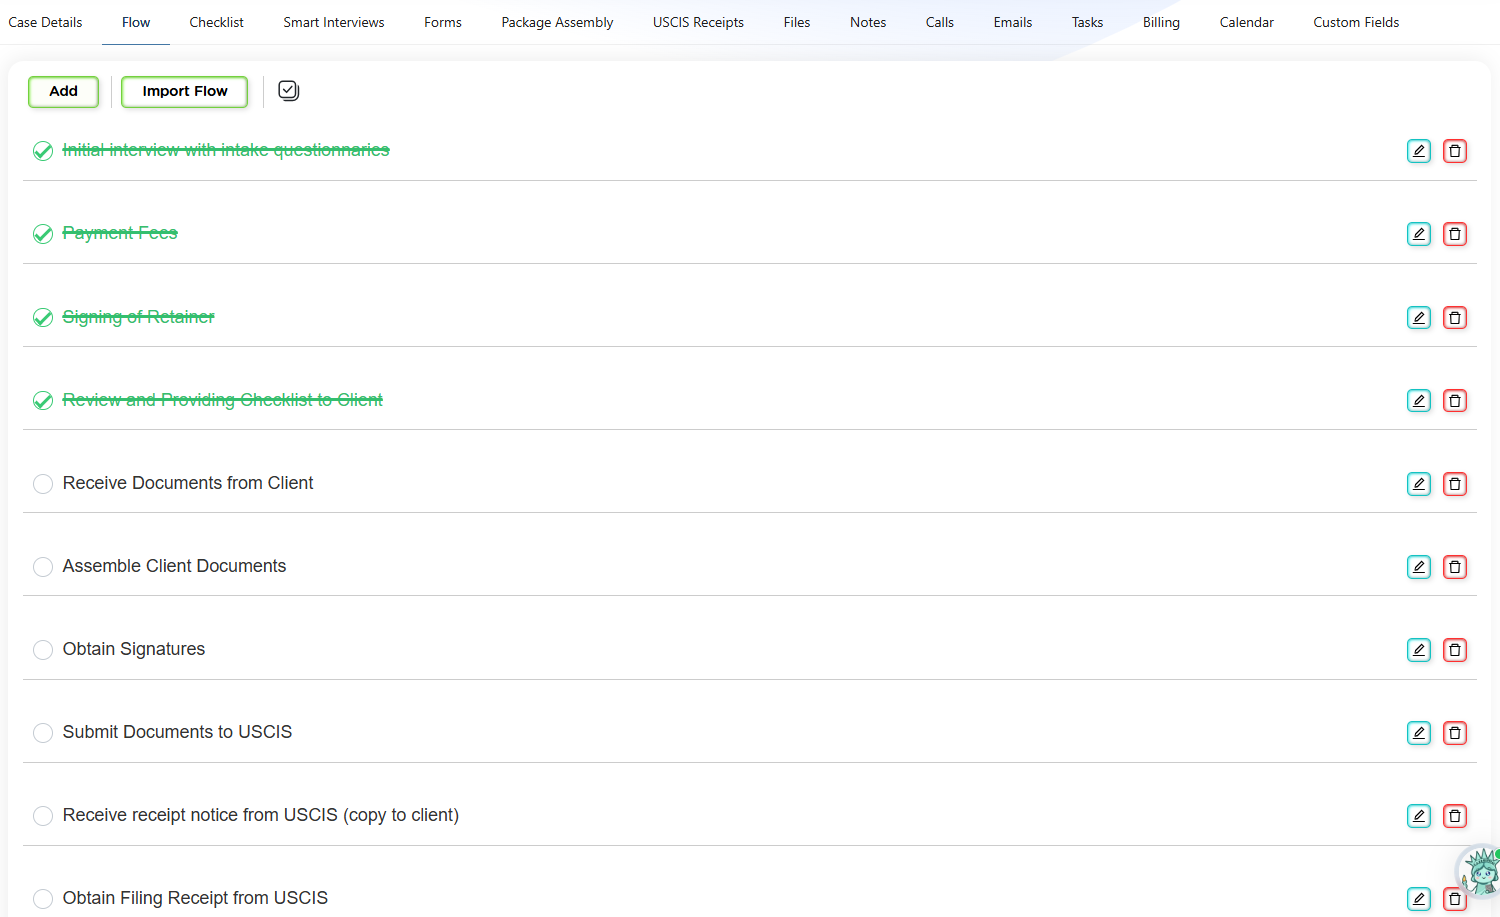
Flow
The Flow tab provides a step-by-step task outline for the case. Flows:
- Are prebuilt for library case types
- Can be edited, reordered, or expanded
- Can be imported from other cases
- Support bulk actions and printing
Flows are especially helpful for training staff and standardizing processes.
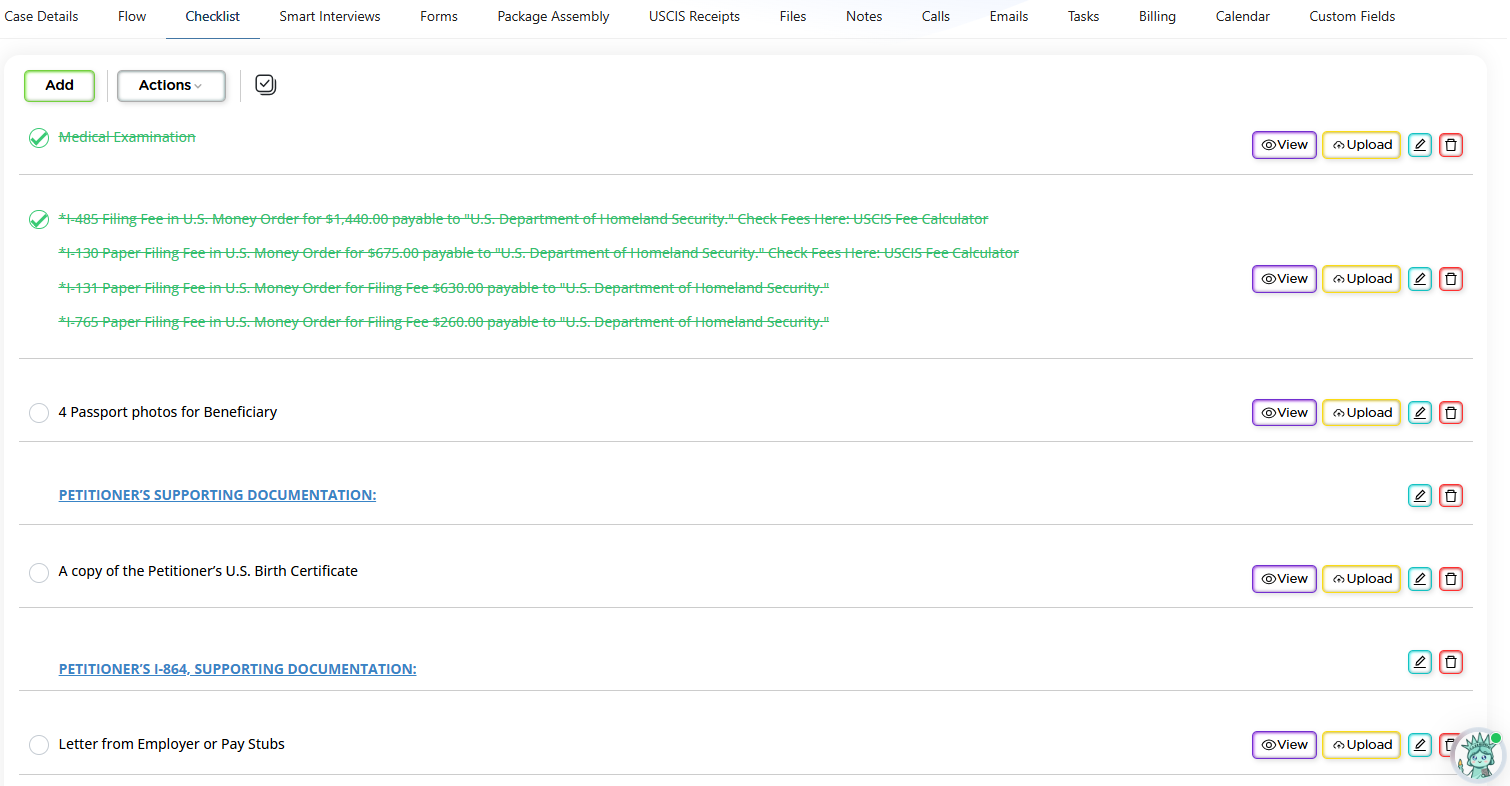
Checklist
Checklists track supporting documentation. They:
- Are case-type specific
- Can be customized
- Can be printed or shared
- Are visible to clients through the Client Portal
Clients can upload documents directly to checklist items when portal sharing is enabled.
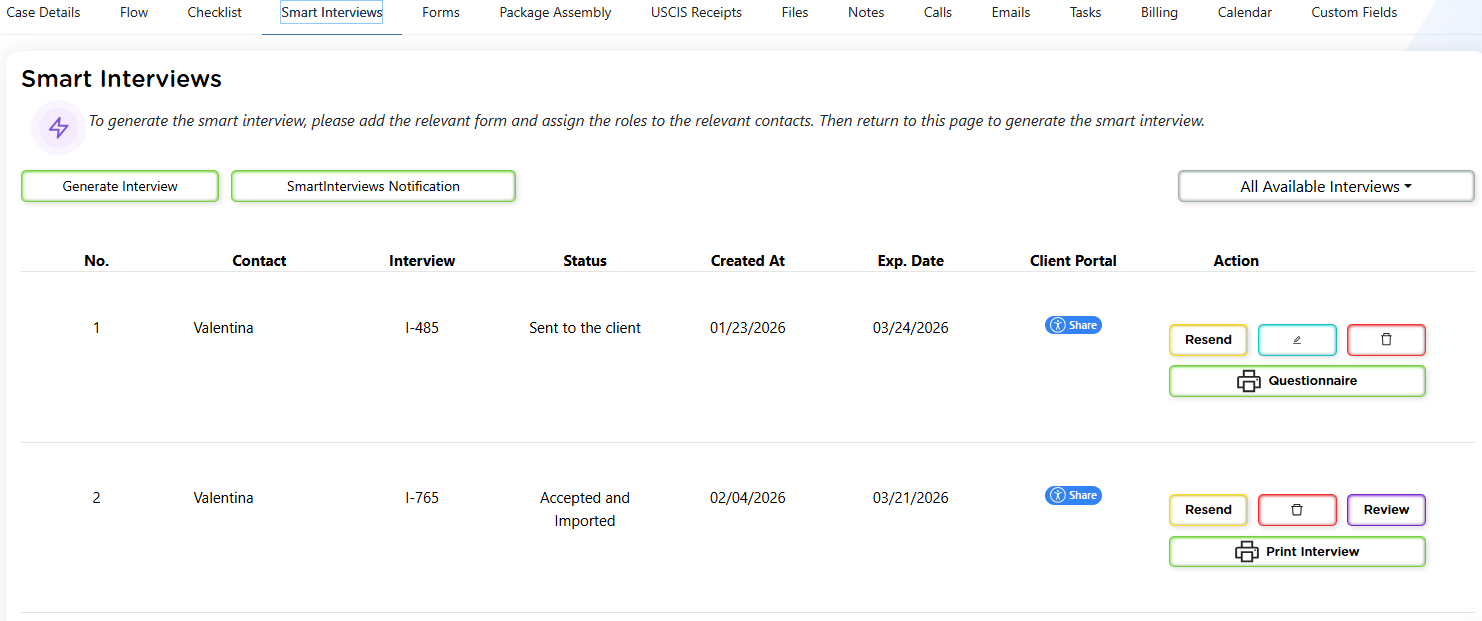
Smart Interviews
Smart Interviews are the primary method for collecting client information. They:
- Are generated per form
- Update contact data
- Autofill forms
- Reduce manual data entry
Answers should be reviewed before importing to ensure accuracy.
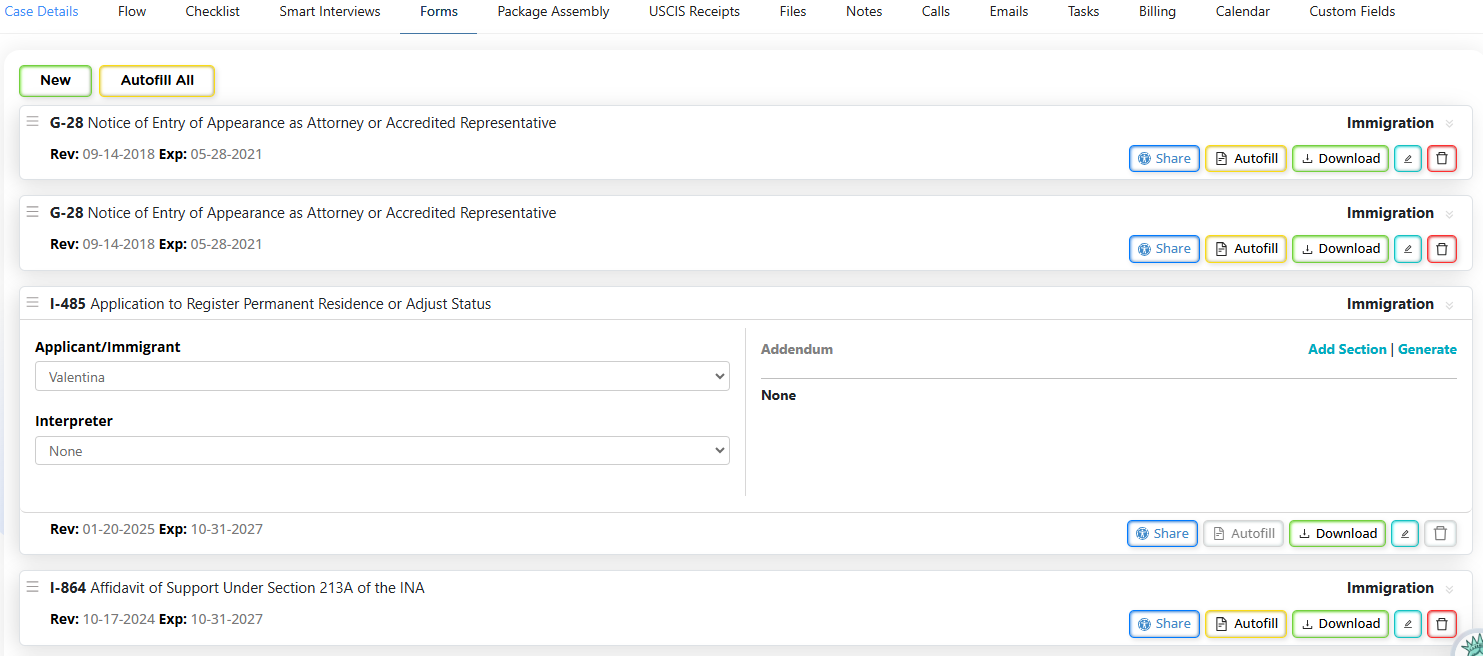
Forms
The Forms tab includes all required forms for the case type. You can:
- Add additional forms
- Identify forms with Smart Interviews
- Assign contacts to form roles
- Share forms through the Client Portal
Roles must be assigned before autofill or Smart Interview generation.
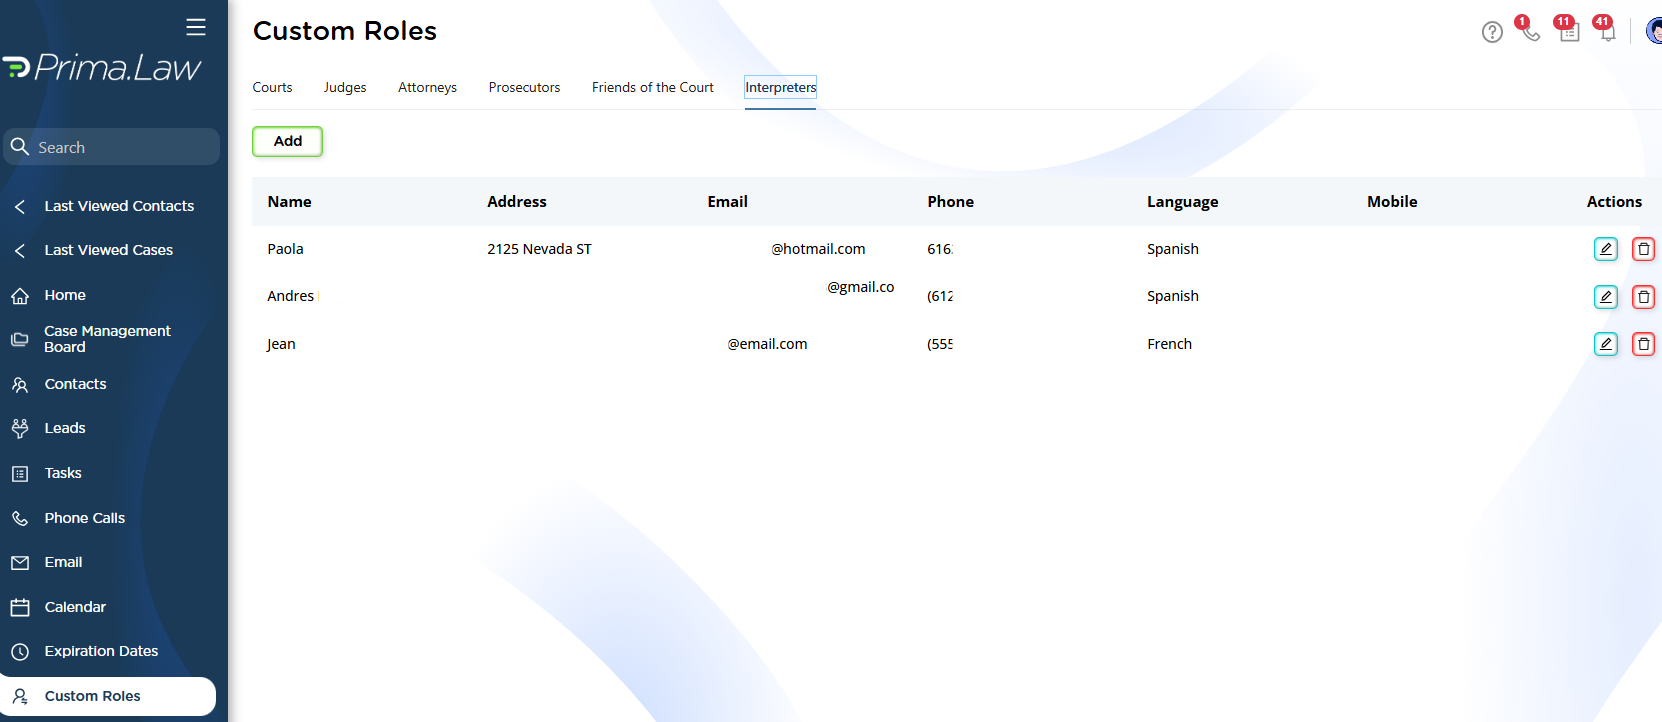
Custom Roles
Custom roles (such as interpreters, courts, or judges) are managed from the sidebar under Custom Roles and can then be assigned to forms.
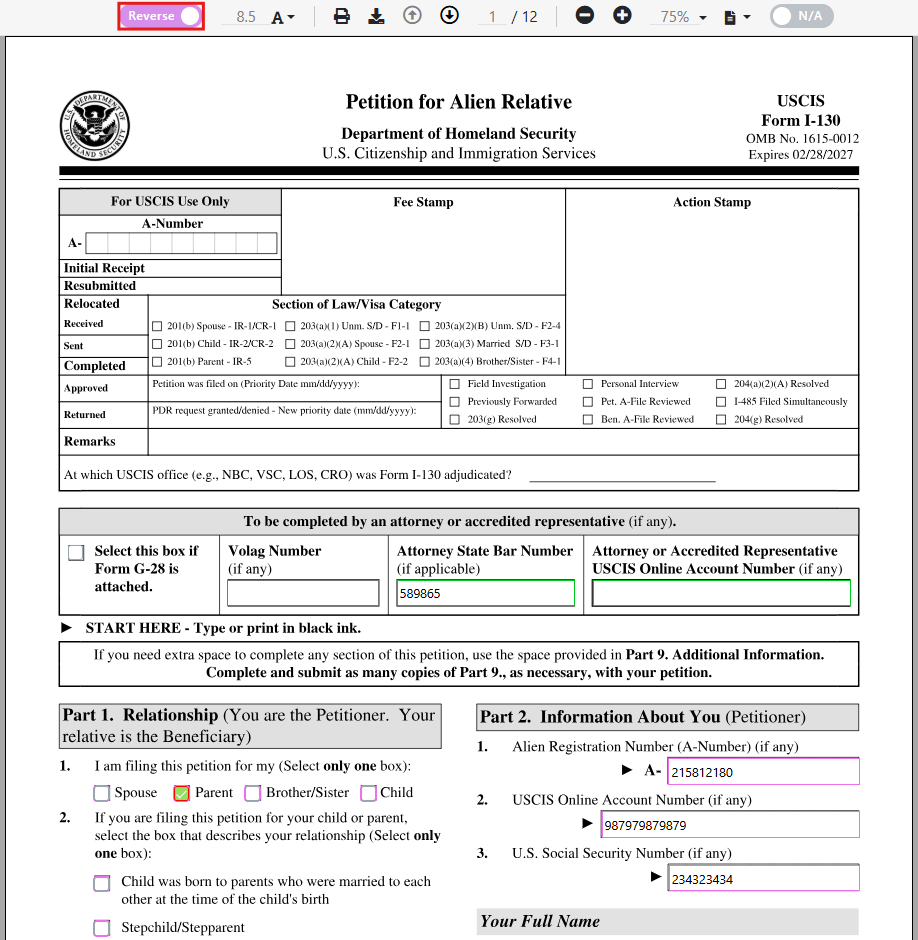
Form Viewer and Reverse Autofill
Opening a form launches the Form Viewer. Key features include:
- Reverse Autofill toggle
- Two-way syncing between form and contact
- Automatic saving on field exit
- Visual indicators for synced fields
Keeping Reverse Autofill enabled ensures data stays consistent across the system.

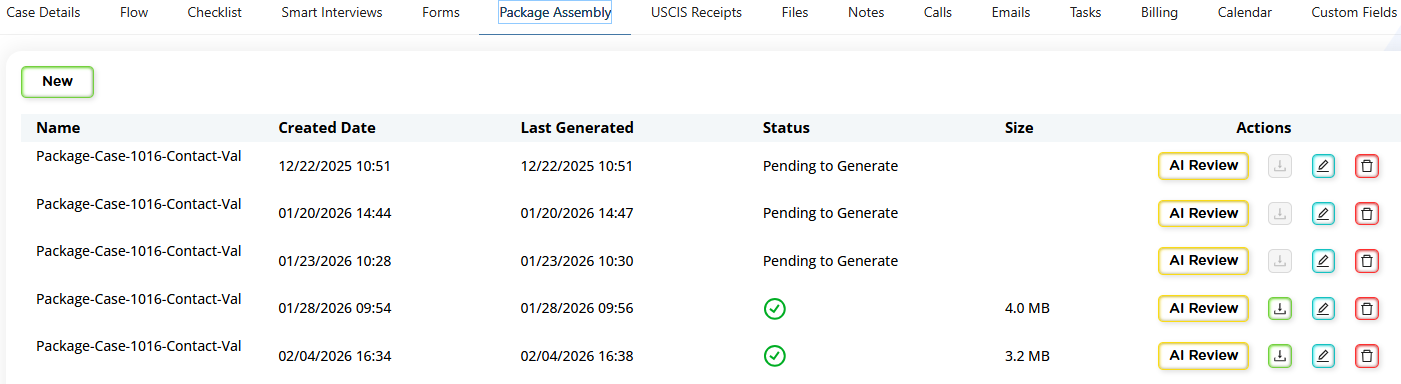
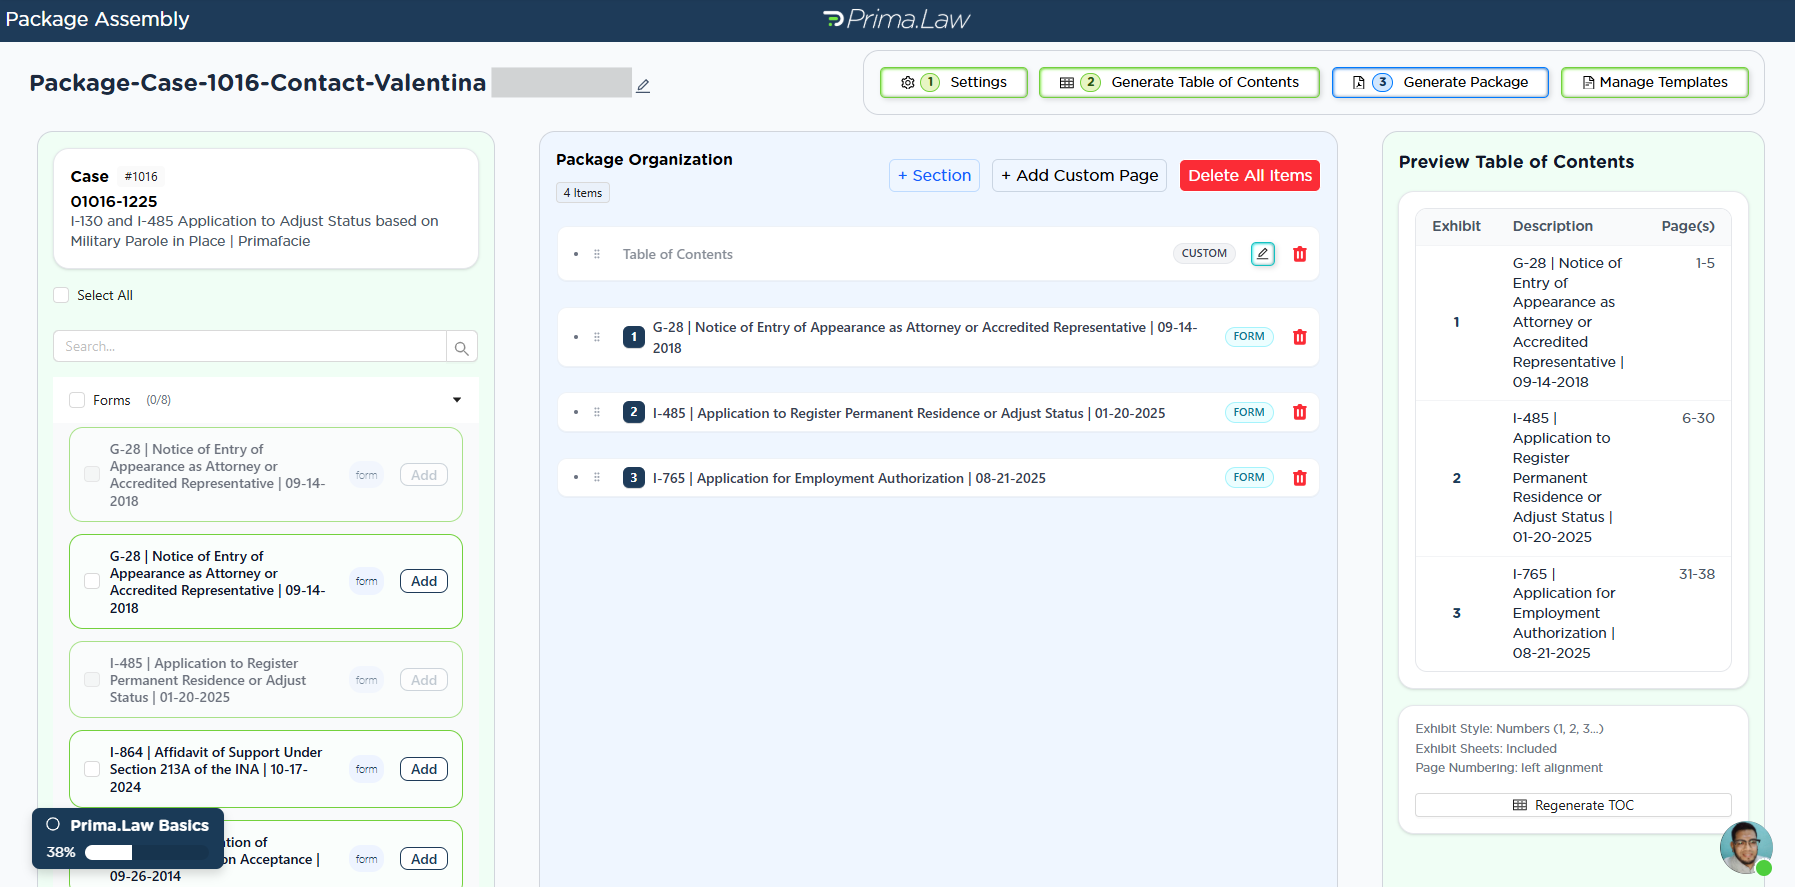
Package Assembly
Package Assembly allows you to:
- Combine forms and documents into a single PDF
- Add cover letters and tables of contents
- Insert exhibit sheets
This reduces reliance on external tools.
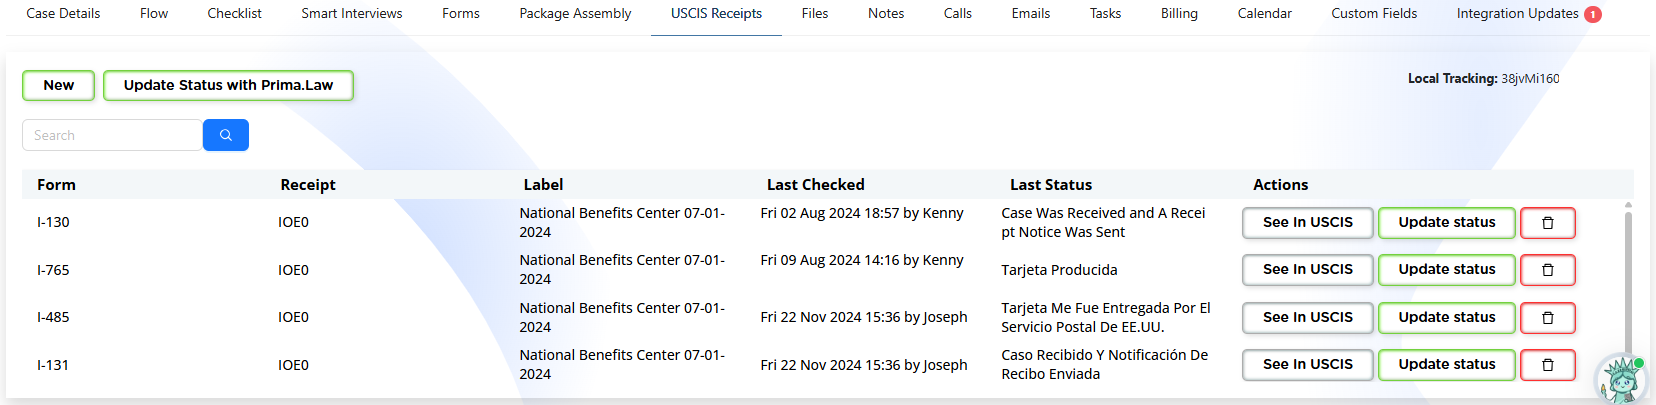
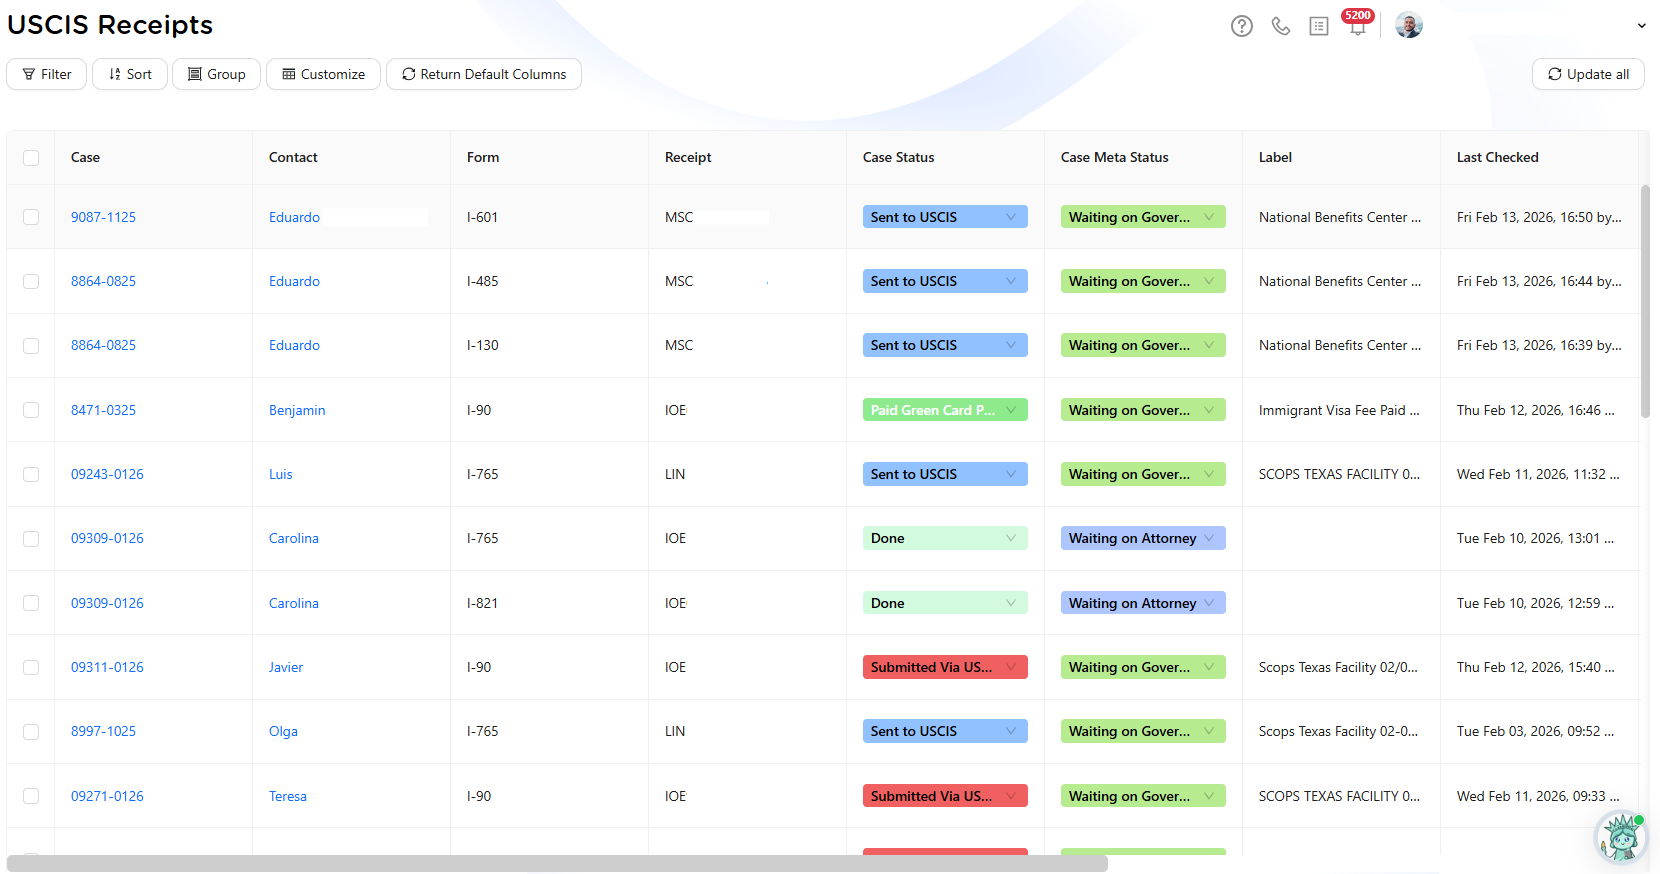
USCIS Receipts
You can log USCIS receipts by:
- Adding receipt numbers
- Linking them to forms
- Updating statuses individually or in bulk
The USCIS Receipts Hub provides a centralized view of all receipts across cases.
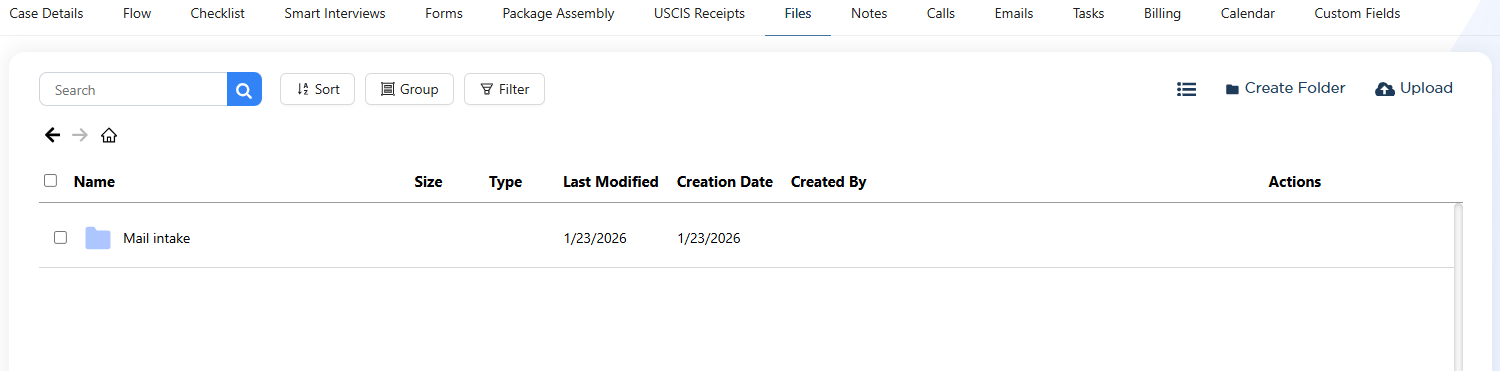
Files
The Files tab is a cloud-based file manager with:
- Unlimited storage
- Folder organization
- Sorting, filtering, and searching
- Direct integration with Package Assembly
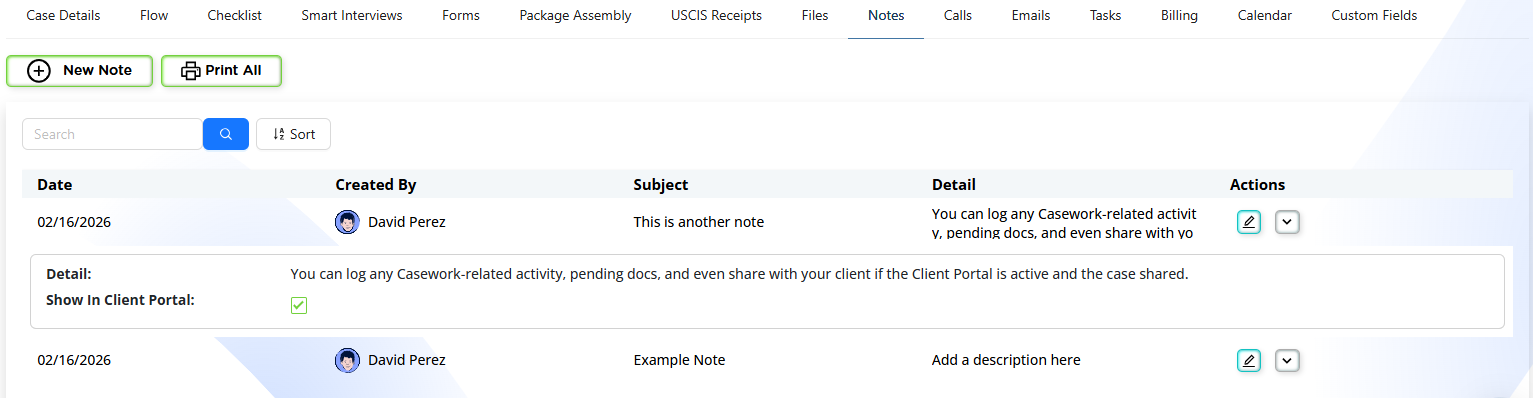
Notes
Notes are used for:
- Activity logs
- Internal reminders
- Case documentation
Notes can be shared through the Client Portal when enabled.
Calls, Emails, and Tasks
These tabs centralize communication and follow-ups:
- Calls can be logged or left pending
- Emails require email integration
- Tasks track assignments, priorities, and deadlines
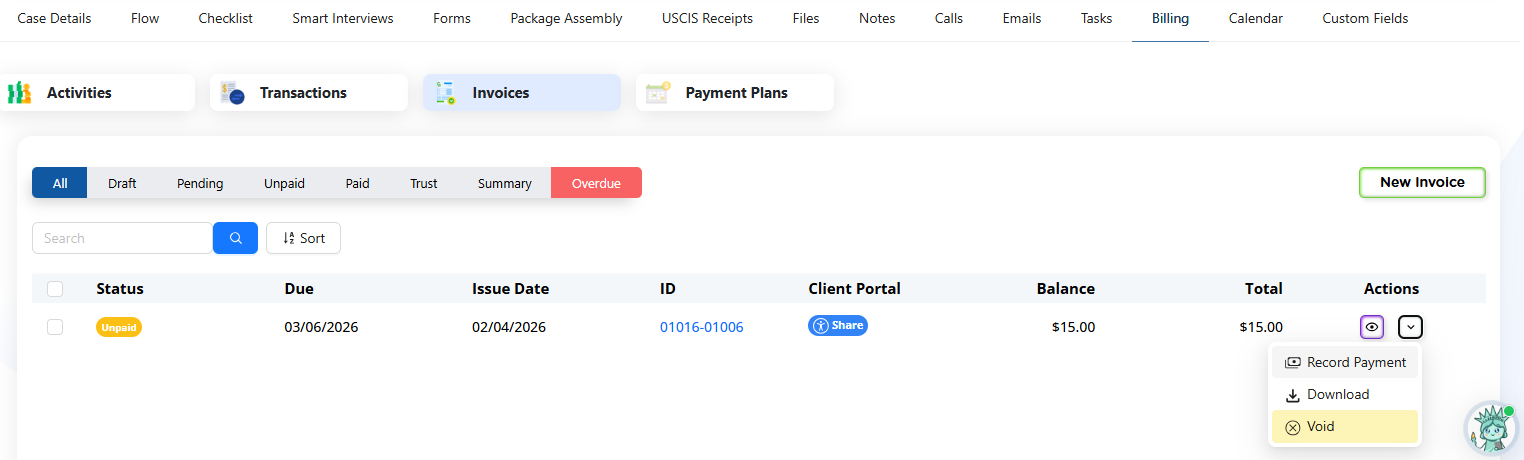
Billing
The Billing tab manages:
- Time and expenses
- Invoices
- Payments
- Payment plans
Billing is handled on a per-case basis.
Calendar
The Calendar tab shows events related to the case and allows event creation directly from the Case Page.
Custom Fields
Custom Fields appear here if configured. Administrators can:
- Create new custom fields
- Choose field types
- Assign them to contacts or cases
- Import fields from integrations such as Clio or PracticePanther
Final Notes
Creating a case establishes the workflow for the entire matter. Once created, all tools in Prima.Law work together to reduce manual entry, centralize communication, and keep case data consistent. Spending time setting up the case correctly ensures smoother work throughout its lifecycle.