
Autofill & Reverse Autofill
How Autofill works
Autofill pulls data from the contact database and places it into the appropriate fields on immigration forms.
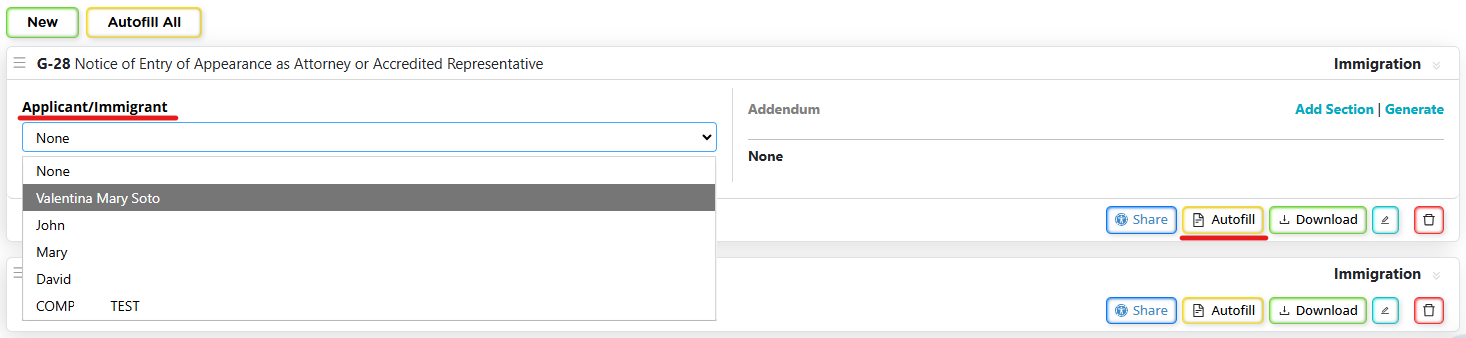
To autofill a form:
- Open a case and go to the Forms tab.
- Select a form.
- Assign the correct roles depending on the context of the application (petitioner, beneficiary, etc.). IMPORTANT: Every application's context is different, it is important to properly identify each contact (person's) role in order to assign them to the correct role within the form, and avoid overwriting data.
- Click Autofill.
The system fills the form using the information stored in the contact profile.
You can also:
- re-autofill a single form, or
- use Autofill All to refresh every form in the case.
Where Autofill gets its data
Autofill uses data stored in the contact profile, which can come from:
- Manual entry in contact or case tabs
(addresses, family, employment, immigration history, etc.) - Smart Interviews completed by clients or staff
- Reverse Autofill from forms (explained below)
Keeping contact data accurate ensures clean autofill across current and future cases.
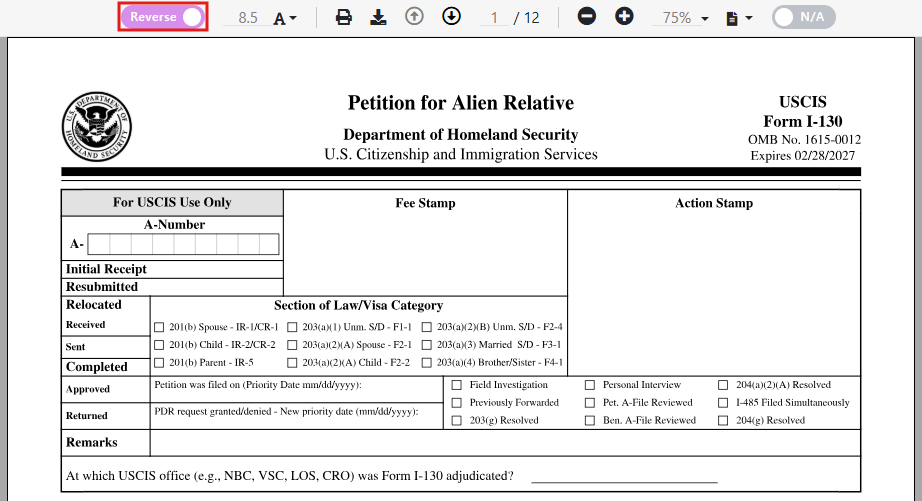
Reverse Autofill (data flows back to the contact)
Reverse Autofill allows you to update the contact database directly from a form.
When enabled:
- Fields highlighted in purple are database-linked.
- Any changes made in those fields are automatically saved to the contact.
- No manual save is required.
This ensures:
- consistency across all forms
- updated data for future cases
- fewer corrections later in the process
Important Reverse Autofill warning
If Reverse Autofill is ON:
- Do not delete or leave blank name fields (applicant, beneficiary, etc.).
- Doing so will erase the name from the contact record.
If you need to modify a name make sure to do so immediately, leaving the Name fields blank will save the Contact's name as such and will make it difficult to search it.
How to find a “missing” contact
Because forms are always linked to a case, the contact can almost always be recovered through the case.
To locate the contact:
- Go to the Case Management Board, or
- Review your recent cases list
Use any information you remember to narrow it down:
- Case name
- Case type
- Assigned attorney or paralegal
- Status or Meta Status
Once you identify the case:
- Open the Case Page
- Click the contact name area (the name is always clickable, even if partially blank)
- This will take you to the Contact Page
From there:
- Edit the contact
- Restore the correct first and last name
- Save the contact
After restoring the name:
- Return to the case
- Open the Forms tab
- Use Autofill again to repopulate the form fields
Best practices to avoid this issue
- Do not leave name fields blank when Reverse Autofill is enabled
- If you need to change a name, replace it immediately rather than clearing it first
- Pay close attention to which role a field belongs to when editing forms
- Be especially careful not to overwrite:
- Beneficiary names with petitioner data
- Petitioner names with beneficiary data
Reverse Autofill is a powerful tool, but it should be used intentionally. Understanding which contact a field belongs to helps prevent accidental data changes and keeps your contact database clean and searchable.
Recommended workflow (most efficient)
- Enter any information you already have into the contact.
- Autofill the form after assigning roles.
- Generate a Smart Interview from that form.
- The interview will already contain existing data.
- The client only completes missing or incorrect sections.
- Review and import the interview data.
This avoids asking clients for information you already have and keeps the database clean.