
Package Assembly
Before You Start: Preparing Your Case
Package Assembly works best when the case is already complete and organized. Before opening the Package Assembly tool, make sure:
- All required forms are added to the case and fully completed
- Form data has been populated using Autofill, manual editing, or Smart Interviews
- Supporting documents are uploaded either through Checklist Items or the Files tab
- Any notes you want to include are already created at the case level
Because Package Assembly exports exactly what exists in the case, incomplete or missing data will carry over into the final package.
Accessing Package Assembly
Package Assembly is accessed directly from the case you are working on:
- Open the relevant Case Page
- Navigate to the Package Assembly tab (next to Forms)
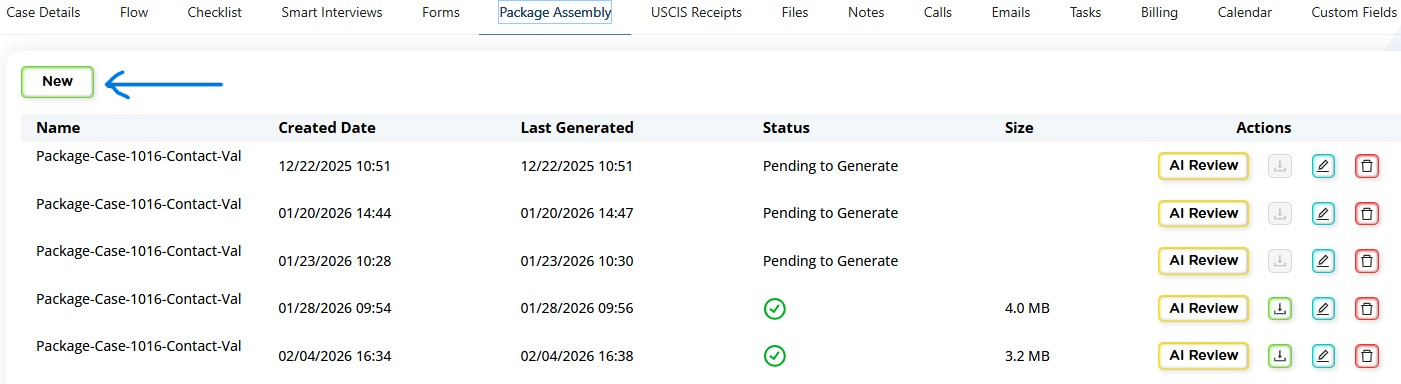
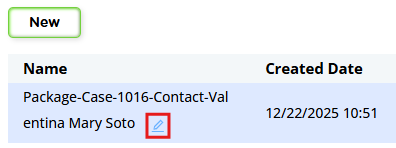
- Click New
You will be redirected to the dedicated Package Assembly environment. This separate workspace is designed to handle large files and complex document compilation efficiently.
Understanding the Package Assembly Interface
The Package Assembly interface is divided into three main sections:
Left Panel: Available Content
This panel contains all items that can be added to the package:
- Forms: Completed legal forms associated with the case
- Checklist Items: Supporting documents uploaded by staff or clients
- Files: General documents attached to the case
- Notes: Optional case notes that may be included as evidence or reference
A search bar is available to quickly locate specific documents when working with large cases.
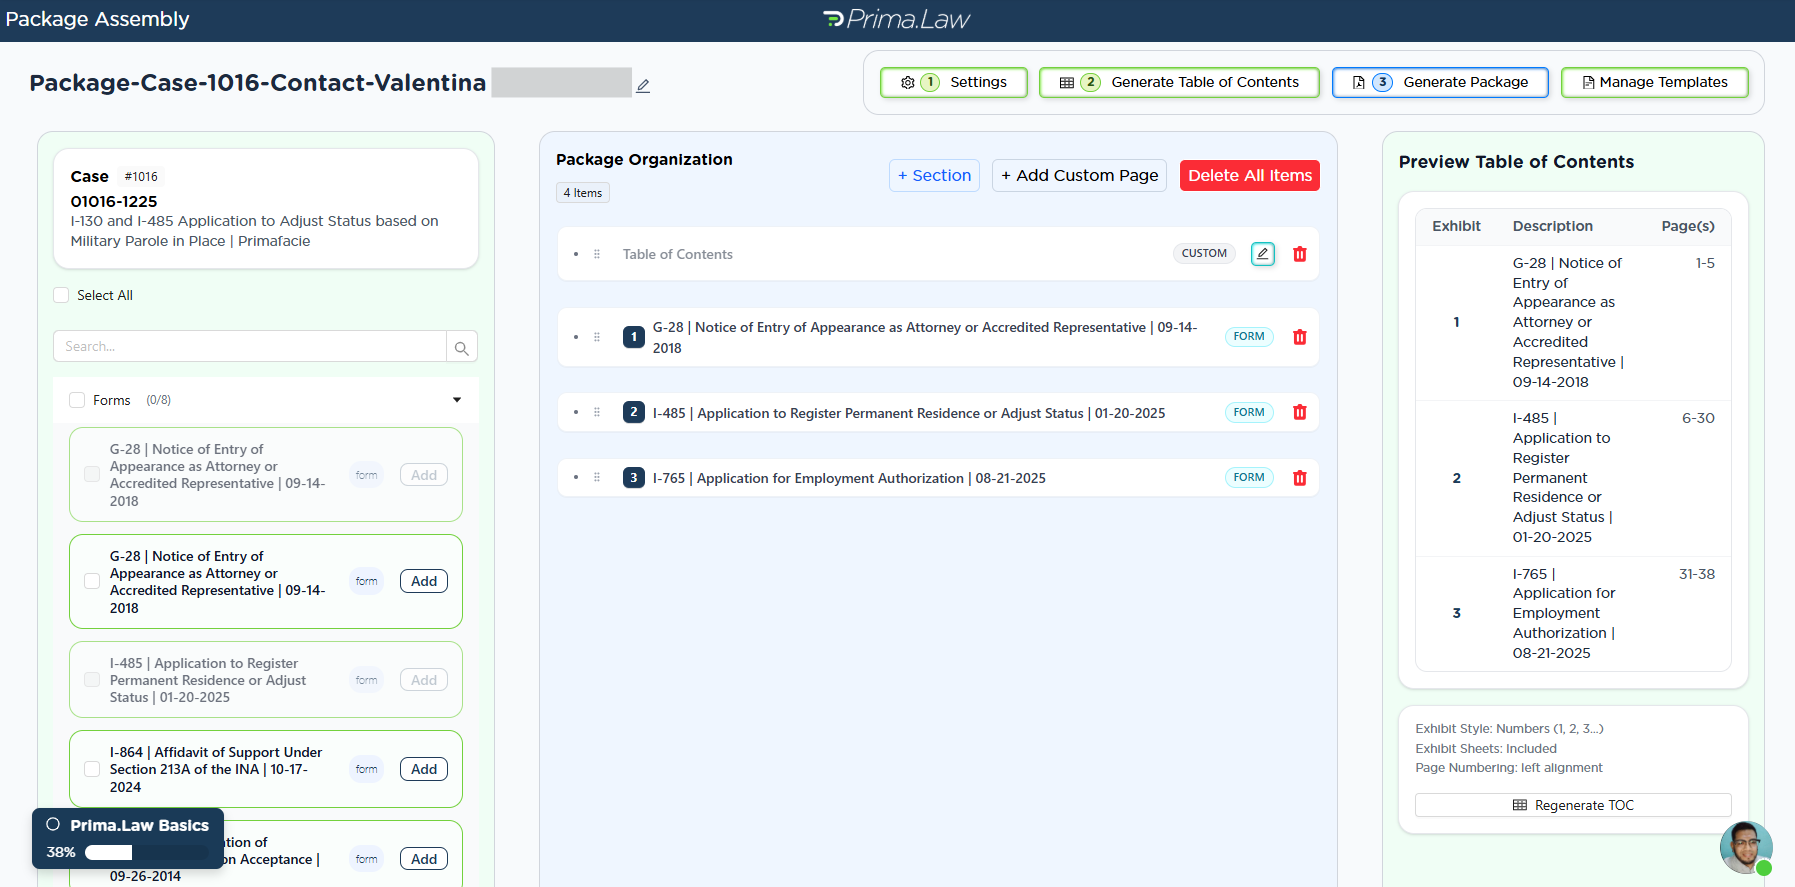
Middle Panel: Package Organization
This section shows the structure of the package you are building. Items added here determine the order and hierarchy of the final PDF.
You can:
- Drag and drop items to reorder them
- Nest items under other items to create subsections
- Create custom sections using + Section and rename them as needed
- Identify item types visually (form, checklist item, file, or note)
When exhibit sheets are enabled, nesting documents under a single parent allows multiple documents to fall under one exhibit rather than generating separate exhibits for each file.
You may also add a Custom Page, which allows you to upload a document or create a page using the built‑in text editor.
Each package has a name, which can be edited at any time to reflect its purpose (for example, filing package, internal review, or client copy).
Right Panel: Table of Contents Preview
This panel displays a live preview of the Table of Contents, allowing you to verify structure, exhibit labels, and page numbering before generating the final package.
Settings and Personalization
Click Settings at the top of the Package Assembly interface to configure how the final PDF will appear.
Exhibit Sheets
- Enable or disable exhibit sheets
- Choose where exhibit numbering begins
- Select labeling style (letters or numbers)
Page Numbers and Footers
- Show or hide page numbers
- Choose the starting document for numbering
- Customize footer text (for example, client name or A‑Number)
- Set footer alignment (left, center, or right)
These settings help ensure compliance with agency or court formatting preferences.
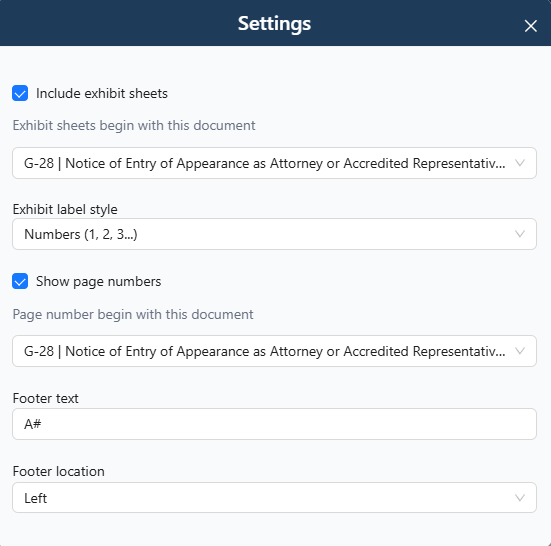
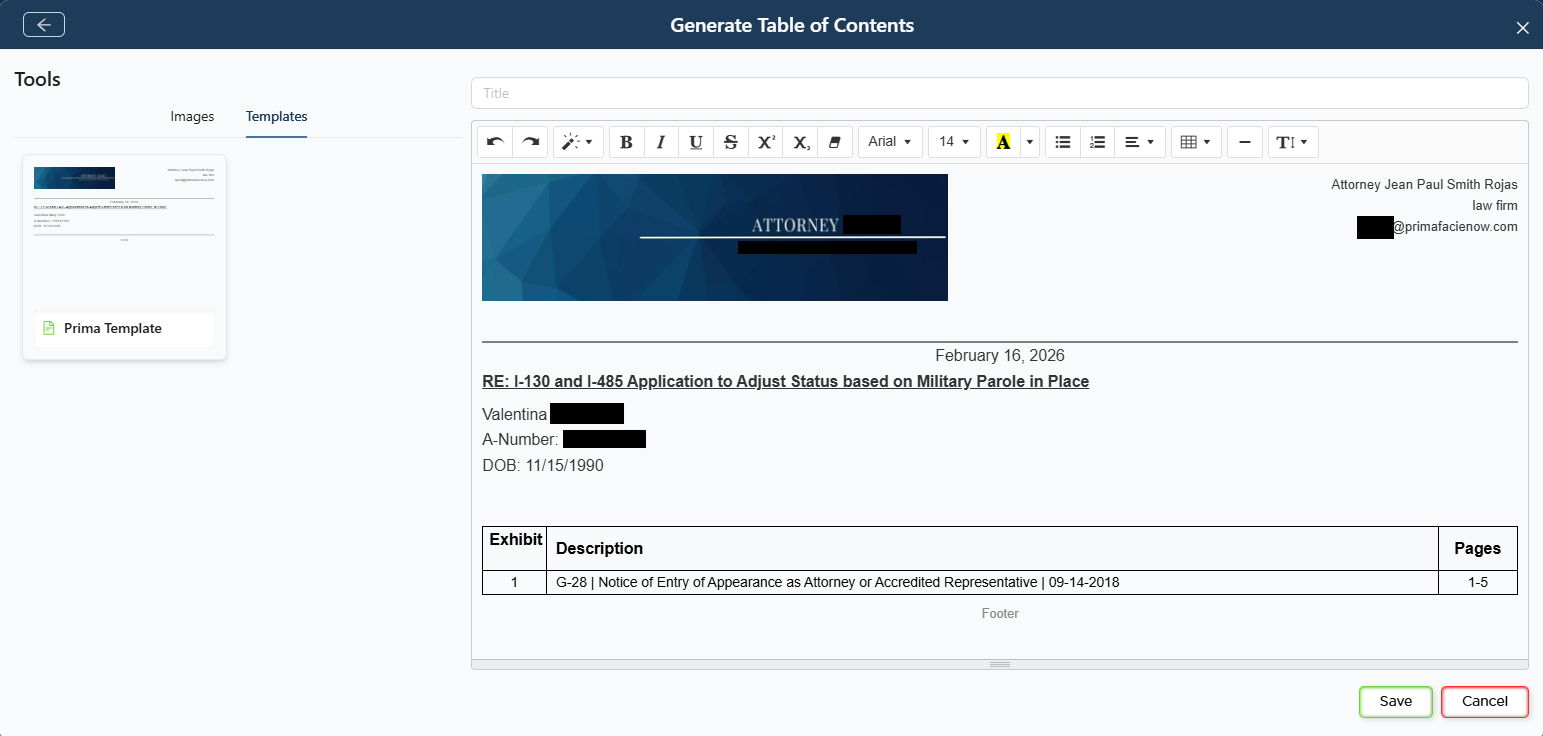
Table of Contents and Templates
You can generate a Table of Contents that lists exhibits, descriptions, and page numbers automatically.
After generating the Table of Contents, you may:
- Edit it directly
- Apply a Template to format it as a cover letter or filing index
Templates can include dynamic fields such as:
- Client name
- A‑Number
- Date of birth
- Case name
- Date generated
Templates can be managed, reused, and customized to match firm branding or filing standards. Using templates is optional but recommended for consistency.
Generating the Package
Once your documents are organized and settings are finalized:
- Click Generate Package
- Confirm the action
The system will compile the package into a single PDF. Processing time depends on the size and number of documents.
You may wait in the interface or receive an email notification when the package is ready.
After Generation
After the package is generated, you can:
- Download the PDF
- Rename the package for clarity
- Reopen, edit, and regenerate the package if changes are needed
- Create additional packages for the same case
There is no limit to the number of packages you can generate for a case.
Best Practices
- Clean up drafts and unused files before starting Package Assembly
- Confirm addendums and supplemental pages are finalized before adding forms
- Regenerate the Table of Contents after reordering documents
- Use descriptive package names to distinguish filings, drafts, and client copies
Package Assembly is designed to keep all filing‑ready materials in one place, reduce reliance on external software, and streamline document preparation for review, filing, or delivery.